
Turning your iPad into the nerve center of your smart home is one of the most practical and powerful ways to get started with home automation. It’s about more than just having a fancy remote; it’s about using the iPad’s beautiful, intuitive screen to command your lights, climate, security, and more from one central spot.
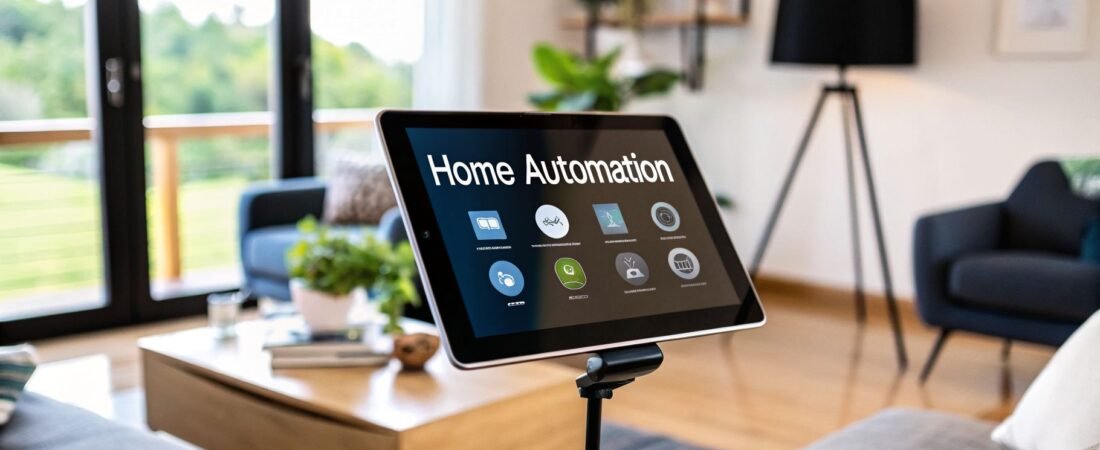
Your iPad as the Smart Home Command Center

Think of it: your home anticipates your needs with a simple tap or voice command. This guide is all about setting that up. We're moving past just flicking lights on and off with an app and diving into how an iPad can become the intelligent brain behind a truly responsive and secure home. The goal is to create an environment that genuinely works for you.
The entire system is built on Apple’s ecosystem, which has always prioritized simplicity and user privacy. We’ll look at how to build a setup that not only makes life more convenient but also boosts your home's safety, helps save energy, and adds a little bit of magic to your day-to-day life.
Before we get into the step-by-step, let's look at the core components that make this all possible. Understanding how these pieces fit together is the key to building a reliable and powerful smart home system.
Core Components of Your iPad-Based Smart Home
This table breaks down the essential elements for your iPad-powered smart home and how they work together to create a seamless experience.
| Component | Role in Your Smart Home | Key Benefit |
|---|---|---|
| Your iPad as a Home Hub | The central processor. It runs automations and gives you remote access when you're away from home. | Allows your smart home to function automatically, without you needing to be present. |
| The Apple Home App | Your command interface. This is where you add devices, create scenes, and build automated routines. | Provides a single, unified app to control all your different smart devices. |
| HomeKit & Matter Accessories | The physical devices: smart lights, locks, thermostats, sensors, etc. | These are the "Works with Apple Home" or "Matter" certified products that integrate directly. |
Each of these parts plays a crucial role, but it's how they communicate and work in concert that truly brings your smart home to life.
Why the iPad Is a Great Choice
You can also use an Apple TV or HomePod as a home hub, and they work great. But the iPad brings something unique to the table: its brilliant, interactive display. It’s not just a hub; it’s a dedicated dashboard for your entire home.
This means anyone in the family—kids, guests, you—can walk up to it and instantly see who's at the front door, check if the garage is closed, or just tweak the temperature. No need to pull out a personal phone or remember a voice command.
The real power of using an iPad is that it makes the abstract idea of a "smart home" a tangible, touchable control panel that everyone can understand and use. It just makes everything more accessible.
The home automation market is growing incredibly fast. Projections show it’s on track to become a $134.89 billion industry by 2030. With the iPad now supporting the Matter standard, it's set up to work with a huge and expanding world of smart devices for years to come. You can read the full research about home automation market growth to see just how big this space is getting.
Turning Your iPad Into the Brain of Your Smart Home

Before you can start building those cool automations, you need to give your smart home a central nervous system. By setting up your iPad as a Home Hub, you’re doing just that. This is the crucial step that elevates your tablet from a simple remote into a true command center, allowing you to control devices and run routines from anywhere in the world.
Think about it: without a hub, your smart lights and plugs only work when your iPhone is on the same Wi-Fi network. That's not very "smart." A Home Hub bridges that gap, so you can turn up the heat on your way back from work or check your cameras while you’re on vacation.
Getting it set up is refreshingly simple. Just make sure your iPad is logged into the same Apple ID you use for all your HomeKit gear.
- First, head to Settings > [Your Name] > iCloud. Scroll down and double-check that the Home toggle is switched on.
- Next, jump over to Settings > Home. Here, you’ll see an option to Use this iPad as a Home Hub. Flip that switch on, and you're in business.
Where to Put Your New Home Hub
This might seem like a small detail, but the placement of your iPad hub is critical. This isn't a tablet you'll be carrying around anymore; it's a permanent fixture that needs constant power and a steady Wi-Fi signal to do its job.
You'll want to place it somewhere central. I've seen clients have great success with a few key spots:
- On the kitchen counter: It’s the perfect spot for family members to see who’s at the door, change the music, or dim the lights for dinner.
- Wall-mounted in the living room: This creates a clean, built-in command center that looks impressive and is always within reach.
- On an entryway table: A tap on your "Goodbye" scene as you walk out the door can lock up, turn off the lights, and adjust the thermostat.
Don't make the classic mistake of treating your hub like a regular iPad. If it runs out of battery or loses its Wi-Fi connection, your remote access is gone and all your automations will stop dead. A dedicated spot with a reliable charger is absolutely non-negotiable.
Getting this foundation right is everything. For a deeper dive into the basics, our guide on how to set up HomeKit will ensure your system is built on solid ground.
How an iPad Compares to Other Home Hubs
While an iPad makes for a fantastic and visual hub, Apple gives you a few other options. It’s worth knowing how they stack up so you can pick the right one for your setup—or even combine them.
| Hub Device | Primary Advantage | Best For |
|---|---|---|
| iPad | Interactive Visual Display: Acts as both a hub and a control panel. | Families who want a touch-friendly dashboard for everyone to use. |
| Apple TV | Set-and-Forget Stability: Always powered on and connected via Ethernet or Wi-Fi. | Users who prioritize a rock-solid, invisible hub running in the background. |
| HomePod/HomePod Mini | Integrated Speaker & Voice Control: Combines a hub with a smart speaker for audio and Siri commands. | Those who prefer voice-first interaction and want to add high-quality sound to a room. |
Honestly, many of us who are deep into home automation use a hybrid approach. My own setup uses an Apple TV hardwired with an Ethernet cable as the primary, bulletproof hub. It handles all the heavy lifting in the background. Meanwhile, a wall-mounted iPad acts as the beautiful, interactive dashboard for my family to use every day. It’s the best of both worlds: unbeatable reliability and a great user experience.
Pro Tip: Lock it Down with Guided Access
If you want to make your iPad feel less like a tablet and more like a dedicated home controller, there's a brilliant feature for that: Guided Access. This nifty tool lets you lock the iPad into a single app, which in our case is the Home app.
You can find it in Settings > Accessibility > Guided Access. Toggle it on and set a passcode. Now, open the Home app and triple-click the side (or top) button. This will start a Guided Access session, preventing anyone—especially kids—from closing the app or messing with other settings. Your smart home dashboard will always be up and ready to go.
Adding and Organizing Your Smart Home Devices
Okay, your iPad is officially the brain of your new smart home. Now for the fun part—actually adding your smart devices and bringing your setup to life. This is where the magic happens, turning a cool concept into a system you can interact with every day. Thankfully, Apple makes adding new accessories incredibly simple.
Almost every device that works with Apple Home has a special eight-digit code or a QR-style pattern on it. This is the handshake that pairs the accessory to your Home app. Check the device itself, the box it came in, or the manual—it's usually in one of those spots.
To add something, just open the Home app on your iPad, tap the “+” icon in the corner, and choose Add Accessory. Your iPad's camera will pop up, waiting for you to scan that code. Once you point it at the code, the app does the heavy lifting, recognizing the device and walking you through the final few steps. It usually takes less than a minute.
The Rise of Matter and Device Freedom
For a long time, the smart home felt a bit like being forced to pick a team. You were either all-in on Apple, Google, or Amazon, and your devices were stuck in that ecosystem. That’s all changed, thanks to a new standard called Matter.
Matter is basically a universal translator for smart home gear. If you see the Matter logo on a box, you can be confident it will work with your Apple Home setup, just like an accessory with the "Works with Apple Home" badge. This is a massive shift that blows your device options wide open.
This is a huge win for anyone building a smart home. You're no longer locked into one brand's ecosystem. You can buy a smart plug you love from one company and a thermostat from another, knowing they'll all cooperate perfectly inside your Home app.
Now you can focus on finding the best tool for the job, not just the one with the right logo. As you expand your system, mixing both HomeKit and Matter-certified products gives you the most flexibility. If you're starting to browse, our guide to the best Apple Home automation devices is a great place to start your research.
Creating Order with Rooms and Zones
When you only have a couple of smart lights, a long list of devices is no big deal. But once you have a dozen or more, that list becomes a chaotic mess. This is exactly why the Home app gives you Rooms and Zones to keep everything tidy.
The moment you add a new device, the Home app asks you to assign it to a Room. Don't skip this! Grouping accessories by their physical location—like "Living Room," "Kitchen," or "Main Bedroom"—is the single most important step for staying organized.
Here are a few tips I've learned for setting up Rooms effectively:
- Get Specific: Instead of a generic "Bathroom," use names like "Upstairs Bath" and "Downstairs Powder Room." It makes voice commands much more reliable.
- Think Logically: A smart plug controlling your desk lamp belongs in the "Office" room, even if the plug is hidden from view.
- Customize Icons: Apple lets you change the default icons. Switching a generic lightbulb to a lamp or ceiling fan icon makes finding what you need at a glance much faster.
Once you have your Rooms set up, you can take organization a step further by grouping them into a Zone. Think of Zones as a way to control entire areas of your house with one command.
For instance, you could create a "Downstairs" Zone that includes your Living Room, Kitchen, and Entryway. With that in place, a simple command like, "Hey Siri, turn off all the lights downstairs," will do exactly that. It's an incredibly powerful shortcut for managing your home.
Building Automations for Your Daily Life
Alright, you’ve got your devices connected. Now for the fun part. This is where we move beyond just tapping buttons and start making your home work for you. Automations are the key—they're what separate a house full of smart gadgets from a truly intelligent home.
Think of it this way: instead of you telling the lights to turn on, the lights just know to turn on when you walk into the room. It’s all about creating these small, seamless moments that make your day-to-day life a little easier.
Getting started is simple. Just head over to the Automation tab inside the Home app on your iPad. Look for the little “+” icon in the corner. This is your command center for building every routine. Apple’s entire system is built on a simple "when this happens, do that" logic, which is incredibly powerful.
Crafting Time-Based Routines
The easiest automations to set up are based on time. They’re perfect for those predictable parts of your day and can add a nice layer of consistency and security to your home. You've got a couple of options here.
- A Specific Time of Day: This is great for daily habits. For instance, you could set your kitchen lights to slowly fade on to 20% brightness at 6:00 AM every morning—a much nicer way to wake up than a blaring alarm.
- Sunrise or Sunset: This is my favorite way to handle outdoor lighting. You can tell your porch and landscape lights to switch on 15 minutes before sunset and turn off at sunrise. The best part? It automatically adjusts with the seasons, so you never have to touch it again.
These time-based routines are surprisingly effective. A fantastic first automation to try is setting your front porch light to turn on at sunset and off at 11:00 PM. It's a small change that makes your home feel more welcoming and secure right away.
Adding a new device, which is the foundation for any automation, is designed to be completely painless. You just scan a code, add the device, and assign it to a room.

The whole process is built to be quick and intuitive, letting you get your new gear up and running in minutes so you can start automating.
Triggering Actions with Sensors
This is when your smart home starts to feel like it has a brain. Sensor-based automations let your home react to what's happening in the environment, and the possibilities are endless.
For example, I have a humidity sensor in my bathroom. I created a simple automation: "When humidity gets above 60%, turn on the exhaust fan." The fan runs automatically until things are back to normal, which has been a lifesaver for preventing mildew. No more forgetting to flip the switch.
Motion sensors are another game-changer. Try putting one in a hallway and setting it to turn the lights on to a very dim 10% after 10 PM. It’s just enough light for a safe trip to the kitchen for a glass of water without blinding you.
Automations Based on Your Location
Location-based automations, or "geofencing," use your iPhone's location to trigger scenes based on who’s home. These are fantastic for both security and saving energy.
A "Leaving Home" scene is an absolute must. You can build an automation so that when the last person's phone leaves the house, all the doors lock, the thermostat kicks into eco mode, and every light turns off. Set it and forget it.
The flip side is a "Coming Home" routine. As soon as the first person arrives, the entryway lights can pop on, the temperature can adjust to your preferred setting, and a HomePod can start playing your favorite "welcome home" playlist. It's an incredibly comforting way to end the day.
These automations aren't just for convenience; they have real-world benefits. An iPad-controlled smart thermostat can help cut heating and cooling costs by 10-15% a year. And on the security front, automated homes are a real deterrent. Studies have shown that well-monitored properties see 26% fewer burglaries. You can discover more insights about home automation benefits to see just how much of an impact it can have.
Securing Your Smart Home and Protecting Privacy
When you use an iPad to run your smart home, you're doing more than just adding convenience—you're connecting your home directly to the internet. That means security and privacy aren't just features; they're absolutely essential. A smart home has to be a secure home, and luckily, Apple has built its entire HomeKit ecosystem with a serious focus on user privacy right from the start.
Apple's commitment to privacy isn't just marketing speak. With HomeKit, all the communication between your iPad hub, your accessories, and your iPhone is protected by end-to-end encryption. This means your data is scrambled and unreadable both when it's sitting on a device and when it's flying through the air.
Think about what that really means: not even Apple can see your data. The commands you give, the status of your lights, and your camera feeds are all completely private. This is a fundamental design choice that sets HomeKit apart from many other smart home platforms.
While that built-in security gives you a massive head start, a truly secure smart home also depends on you. A few smart habits will ensure your home stays a private sanctuary, not a security risk.
Best Practices for Network Security
Your Wi-Fi network is the front door to your entire smart home. Protecting it is your first and most important line of defense. Start with the basics: make sure your router is using the WPA3 or, at minimum, WPA2 security protocol. And please, change the default password. Use something long, complex, and unique.
Here’s a pro tip for taking your network security to the next level: set up a dedicated guest Wi-Fi network just for your smart home gadgets. This is incredibly effective for a couple of key reasons:
- Isolation: By putting all your IoT devices on a separate network, you isolate them from your main network where your personal computer and phone live. This keeps your sensitive financial and personal files completely separate from your smart plugs and cameras.
- Containment: In the rare case that a smart device gets compromised, the problem is stuck on the guest network. It can't spread to the computers and phones that hold your most important data.
Beyond the network, don't forget about your Apple ID—it's the master key to your whole HomeKit castle. Lock it down with a strong, unique password and, most importantly, enable two-factor authentication (2FA). This is non-negotiable.
Managing Device and Video Security
One of the best security features Apple offers is HomeKit Secure Video. If you use compatible cameras, all the intelligent analysis—like spotting the difference between a person, a pet, or a car—happens locally on your iPad hub. Only after that analysis is the video encrypted and sent to your iCloud account for storage.
This local-first approach is a huge win for privacy. It means raw, unanalyzed video footage from inside your home never gets sent to the cloud. You also get granular control, letting you decide exactly when cameras should stream or record based on whether you’re home or away.
Finally, keeping your devices updated is a simple but critical security habit. Manufacturers constantly release firmware updates to patch security holes. Make a point to periodically check the Home app or the manufacturer’s app for updates and install them right away. For a deeper dive, our guide on general IoT security best practices has even more great tips. Similarly, understanding the tactics for protecting IoT devices will give you a well-rounded and robust security posture.
Frequently Asked Questions About Home Automation with an iPad
Diving into home automation with an iPad is an exciting step, but let's be honest, it can bring up a lot of questions. I've been there. It's a powerful setup, but a few key details can make the difference between a frustrating experience and a seamless one.
Let's walk through some of the most common questions I hear from people just getting started. Getting these right from the beginning will save you a ton of headaches later on.
Can I Use an Older iPad for Home Automation?
Technically, yes, but you really need to weigh the pros and cons. The key is that your iPad needs to run a recent version of iPadOS to act as a proper Home Hub. This isn't just about getting the latest features; it's crucial for security patches and compatibility with new standards like Matter.
While an old iPad Air 2 might boot up and run the Home app, you'll likely feel the lag. Trying to manage more than a few devices or run complex scenes can become a frustrating experience. You'll notice delays when you want to see a camera feed quickly or when your "Good Morning" scene is supposed to fire.
For a smooth, responsive system—especially if you plan on using processor-heavy features like HomeKit Secure Video—a more recent iPad is a much better investment. No matter what model you land on, though, two rules are non-negotiable: keep it plugged into power 24/7 and make sure it has a rock-solid Wi-Fi connection.
What Happens If My iPad Home Hub Loses Power or Internet?
This is a big one. When your dedicated iPad hub loses its power or connection to the internet, the "brain" of your smart home effectively shuts down. When that happens, you instantly lose two major functions.
First, all remote access is gone. You won't be able to adjust the thermostat on your way home from work or check your security cameras while you're on vacation.
Second, your automations will stop running. That "Good Night" scene you created won't lock the doors, and the lights won't turn on automatically at sunset. You can still control individual devices from your iPhone or another Apple device while you're at home on the same Wi-Fi network, but the automated intelligence is offline.
This is exactly why keeping the iPad on a reliable power source is an absolute must. I even recommend plugging the hub into a small, inexpensive battery backup (UPS). It's a cheap insurance policy against brief power flickers, ensuring your home stays smart even when the grid doesn't.
Do I Need to Buy Only 'Works with Apple Home' Devices?
Not anymore, and this is fantastic news for everyone. For years, we were mostly stuck with devices carrying the "Works with Apple Home" badge. It guaranteed a smooth setup but definitely limited our options and sometimes our budget.
The arrival of the Matter smart home standard changed everything. Think of Matter as a universal translator for smart home gear. As long as a device is Matter-certified, it will play nicely with your Apple Home setup through your iPad hub, even if it's made by Google, Amazon, or a smaller brand.
This gives you an incredible amount of flexibility. When you're out shopping for a new smart plug or light switch, you can now confidently look for either the "Works with Apple Home" logo or the Matter logo. Either one means it will integrate right into your system. To better grasp the security side of adding more devices, looking into common IoT security challenges is a great idea—more connections mean more entry points to keep secure.
Is an iPad Better Than an Apple TV or HomePod as a Home Hub?
This is less about "better" and more about "better for what?" Each device has its own lane, and the best choice really comes down to how you plan to use your system.
- Apple TV & HomePod: These are the ultimate "set-it-and-forget-it" hubs. They're always on, always connected, and sit quietly in the background running your automations with rock-solid reliability. They’re built for that one job.
- iPad: The iPad's superpower is its interactive display. It’s not just a hub; it's a beautiful, visual command center. It's far superior for quickly viewing camera feeds, making on-the-fly adjustments, and giving guests or family an easy way to control the home without needing an app on their own phone.
Frankly, many of the most robust smart homes I've seen use a hybrid approach. They'll have an Apple TV tucked away as the primary, ultra-reliable hub handling all the backend automation work. Then, they'll have a wall-mounted iPad acting as that beautiful, functional control panel for daily use. It's the best of both worlds: unbeatable stability paired with a fantastic user experience.
At Automated Home Guide, we are committed to helping you create a smarter, safer, and more convenient home. Explore our other articles and guides to unlock the full potential of your smart home setup. For more expert tips, visit us at https://automatedhomeguide.com.


Leave a Reply