
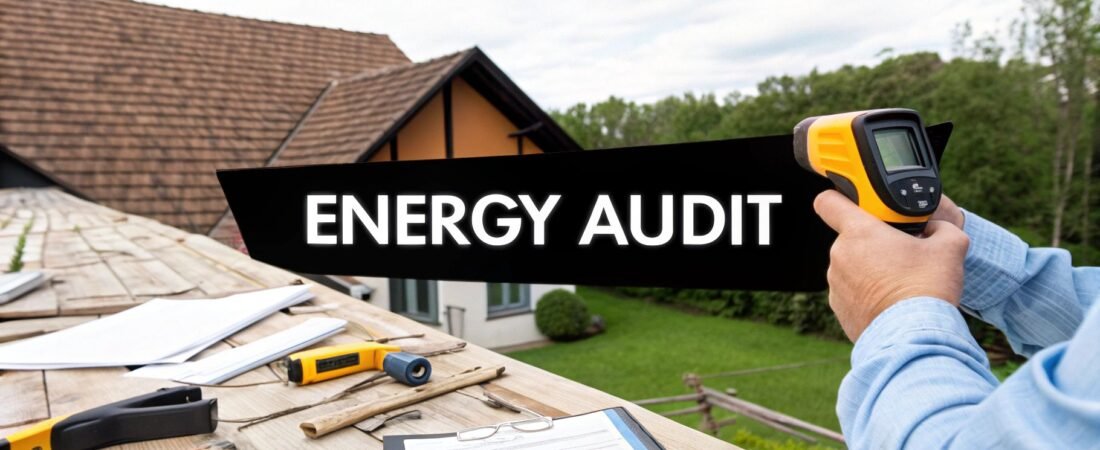
Think of a home energy audit checklist as your strategic plan for slashing utility bills and making your house a more comfortable place to live. It’s a methodical walkthrough, guiding you from the attic insulation right down to the appliances in your basement, helping you spot exactly where your hard-earned money is leaking out.
Why a Home Energy Audit Is Worth Your Time
Before you start poking around in corners with a flashlight, it’s worth taking a moment to appreciate what an audit really does. This isn’t just about ticking off boxes on a list; it’s the first concrete step you can take to get a real handle on your utility costs and make your home feel better year-round. Think of it as a financial check-up for your property.
A systematic audit shines a light on all those small, often invisible, problems that quietly drain your bank account. A drafty window frame here or an uninsulated pipe there might not seem like a big deal, but when you add them all up, they can have a massive impact on your monthly bills.
More Than Just Saving Money
While lower energy bills are obviously a huge win, the benefits don't stop there. A proper audit gives you a clear, objective look at your home’s performance, which lets you make smart investments that can actually increase your property value down the line. Let's be honest, energy-efficient homes are a big draw for buyers who'd rather move into a place where the energy headaches have already been sorted out.
The ripple effect is even bigger than your own wallet. Since 1971, global greenhouse gas emissions from energy production have jumped by nearly 50%. That’s a staggering number, and it underscores why managing our own consumption matters. When you do an audit, you're not just improving your home; you're doing your part to make your home energy-efficient and contribute to a much larger effort.
Key Takeaway: An energy audit connects the dots between small fixes, like sealing a drafty window, and achieving significant financial and environmental goals. It turns vague ideas about "saving energy" into a concrete to-do list.
Ultimately, this whole process is about creating a living space that’s more comfortable, valuable, and sustainable. By following a structured checklist, you get the knowledge you need to turn your findings into a prioritized action plan that makes a real difference.
Gearing Up for Your Home Energy Audit

Before you start poking around in corners and climbing into the attic, a little prep work goes a long way. A successful audit is all about efficiency, and that starts with having everything you need right at your fingertips. Think of it like a surgeon laying out their instruments—it prevents you from running back and forth and keeps you focused on the task at hand.
You don't need a whole van of expensive gear to do this right. In fact, you probably have most of what you need already. The rest are inexpensive tools that give you a massive leg up in finding those hidden energy drains.
Your Essential Audit Toolkit
Get your gear together before you start the walkthrough. This small collection of items will make your inspection much more thorough and productive.
- Flashlight & Ladder: You can't fix what you can't see. These are non-negotiable for getting a good look at those dark, forgotten places like crawl spaces, basements, and attics where some of the biggest energy culprits hide.
- Caulking Gun & Weatherstripping: I always recommend having these with you as you go. There's nothing more satisfying than finding a draft around a window and sealing it up right then and there.
- Tape Measure: Absolutely essential. You'll need it to check the depth of your attic insulation and measure windows or doors if you’re thinking about future upgrades.
- Infrared Thermometer: This is your secret weapon, seriously. It lets you "see" temperature. Point it at a wall or window, and it will instantly show you cold spots that signal an air leak or a gap in insulation that you'd never find with your bare hands.
Don't Forget Your Most Important Tool: Data
The most powerful tool in your arsenal isn't in your toolbox—it's in your filing cabinet or email inbox. Before you do anything else, round up at least 12 months of your utility bills. This includes electricity and any other fuels you use, like natural gas or oil.
This history is your baseline. It tells the story of your home's energy use, showing you the predictable spikes in the summer and winter. Without this data, you're just guessing. With it, you can accurately measure how much money your improvements are actually saving you. Many people are shocked when they see their seasonal usage patterns laid out in black and white.
Having a full year of bills helps you pinpoint your home's "base load"—the amount of energy it uses no matter what, even when you're on vacation. Reducing that base load is a fantastic starting point for year-round savings and a key step in building an energy-efficient smart home.
By taking the time to gather your physical tools and your energy data, you're setting yourself up for a much more effective audit. You'll be ready not just to find problems, but to understand them, fix them, and prove that your hard work paid off.
Your Room-by-Room Inspection Checklist
Alright, this is where the rubber meets the road. It’s time to put on your detective hat and start the systematic inspection of your home. We're going to move through your house, zone by zone, to uncover exactly where your energy dollars are slipping away. It's not just about finding the obvious drafts; we're hunting for all those subtle inefficiencies that quietly add up.
A methodical approach is key. By starting from the outside and working your way in, from the foundation right up to the attic, you won't miss a thing. This structured walkthrough ensures your findings are both thorough and, more importantly, actionable.
Start with the Exterior Envelope
Before you even think about going inside, your home's exterior can tell you a lot about its energy performance. This "building envelope" is your main shield against the elements. Any chinks in this armor will have a direct impact on your heating and cooling bills.
Take a slow walk around the perimeter of your house. Keep your eyes peeled for cracks in the foundation or siding. Pay close attention to gaps around outdoor spigots, cable entries, and other utility connections. These are literal holes letting outside air pour into your home.
Now, give your windows and doors a close look.
- Check the weatherstripping on all your exterior doors. Is it brittle, squashed flat, or missing chunks?
- Examine the caulk around the window frames. If it's peeling away or has visible gaps, it’s not sealing anything.
- Try the dollar bill test—it's an oldie but a goodie. Close a window or door on a dollar bill. If you can pull it out with no resistance, you've found an air leak that needs attention.
Move Inside to Living Areas
Once you're back inside, carry that same critical eye into your main living spaces. This is where you and your family spend the most time, so making these areas more comfortable and efficient delivers a huge win. Grab your infrared thermometer and scan the walls, especially the ones facing the outside. Any significant cold spots are a red flag for missing or poorly installed insulation.
Don't forget to check the electrical outlets and light switches on those exterior walls. I've found these are some of the sneakiest sources of drafts. You can often feel a slight breeze with the back of your hand, or you can use the incense stick test to see if the smoke wavers.
This is also the perfect moment to assess your lighting. Any good energy audit has to include a look at the light bulbs. Making the switch from old incandescent bulbs to modern LEDs is one of the simplest, most effective upgrades out there. LEDs use about 75% less energy and can last up to 25 times longer. For a typical household, that can add up to $225 in savings per year. You can dive deeper into these kinds of upgrades by exploring guidelines on sustainable housing.
Focus on High-Use and Mechanical Areas
Your kitchen, laundry room, and basement are where the big energy hogs live. Appliances are a major slice of your electricity pie, so they need a thorough look. For instance, check the temperature settings on your fridge and freezer; they rarely need to be on the absolute coldest setting to do their job properly.
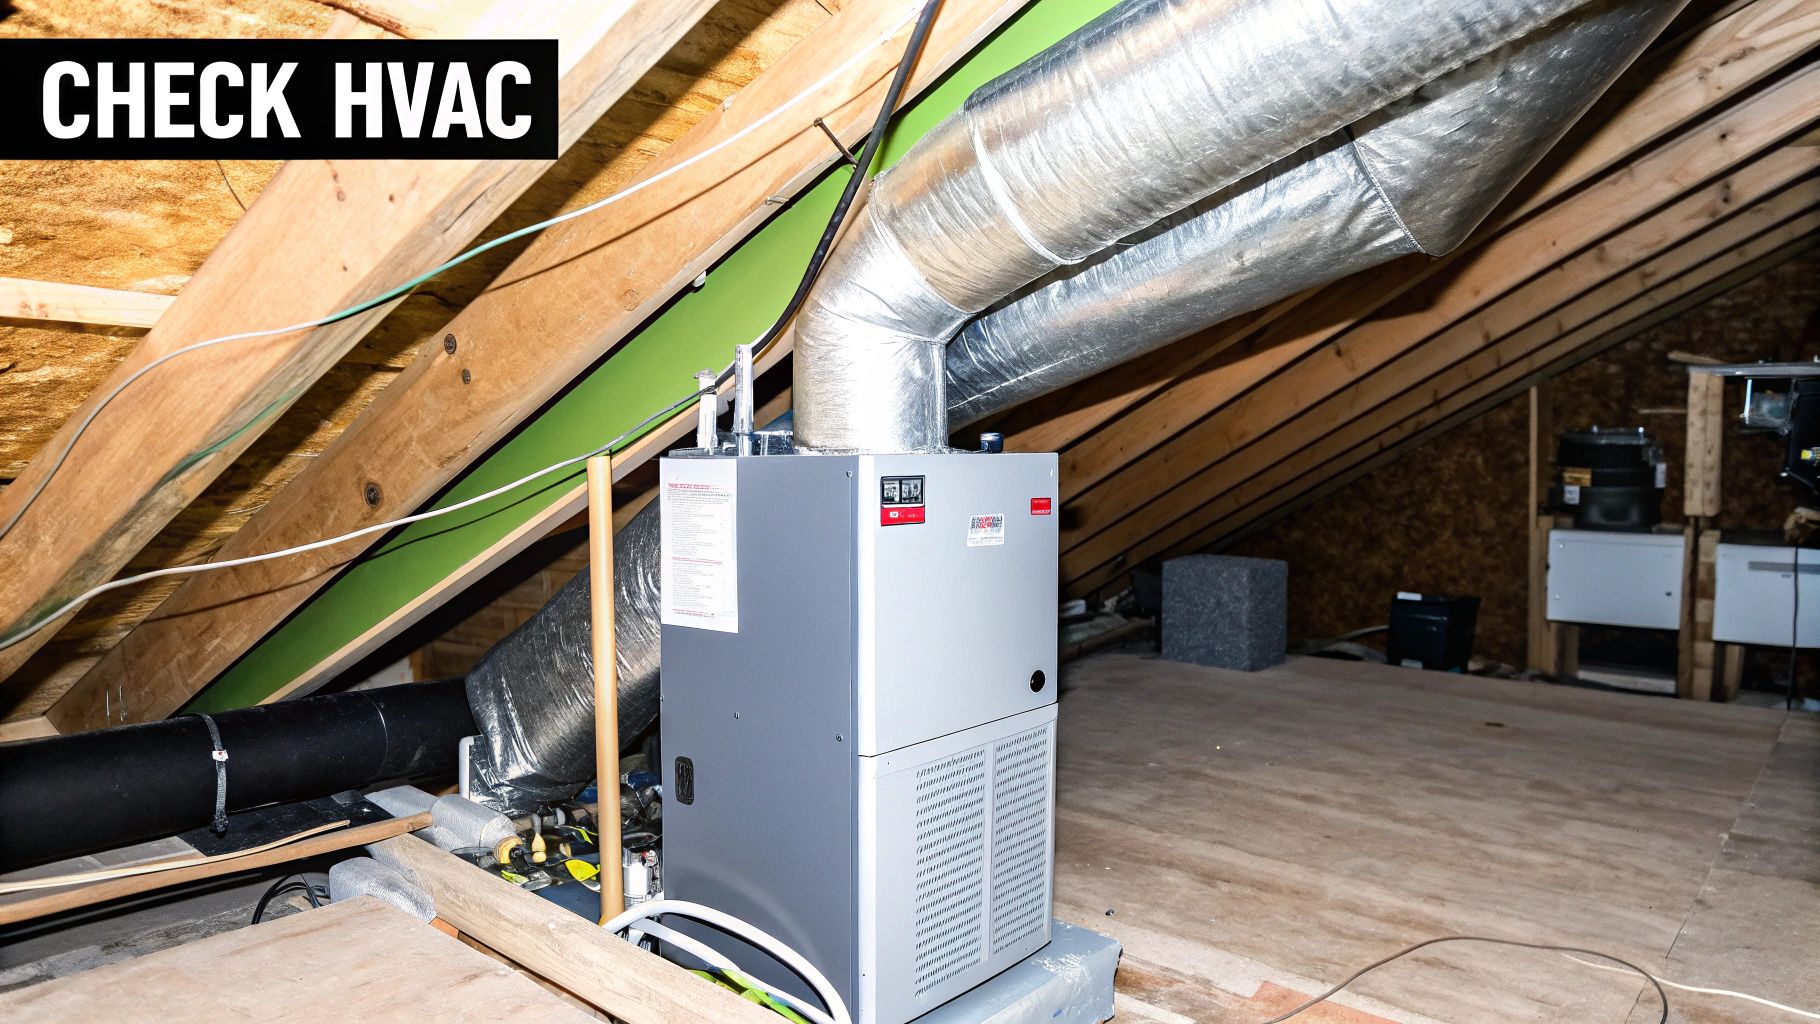
Head down to the basement or utility closet to inspect your furnace, water heater, and any ductwork you can see.
- HVAC System: When was the last time you checked the filter? A clogged filter forces the whole system to work overtime, which is a massive energy waste.
- Water Heater: The temperature should be set to about 120°F for most households. Also, feel the hot water pipes coming out of the tank—if they're warm to the touch, they should be insulated.
- Ductwork: Look for any gaps, tears, or disconnected joints. I've seen systems where leaky ducts were losing up to 30% of the conditioned air into the basement or attic. That's just throwing money away.
This simple graphic does a great job of breaking down the core process of finding and fixing these common issues.
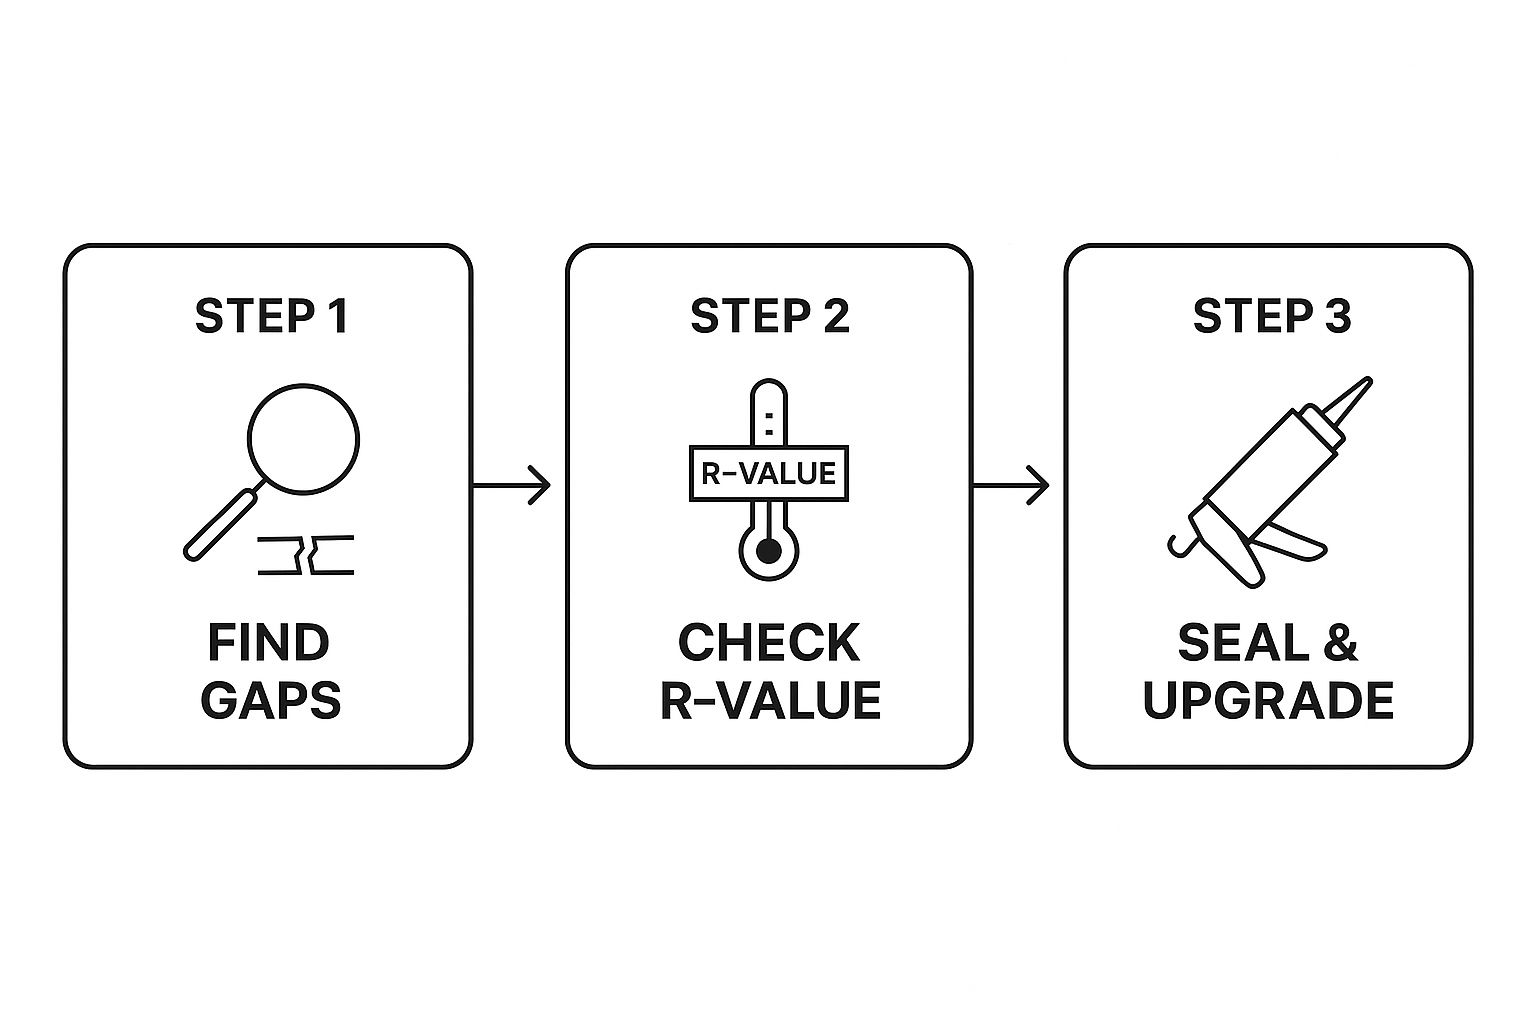
As you can see, it always starts with identification—finding the gaps and checking insulation levels—before you can move on to the satisfying part of sealing things up and making real improvements.
Your DIY Home Energy Audit Checklist
To keep your inspection organized, I’ve put together this checklist. Use it to guide you through your home and make notes as you go. This will become your roadmap for making targeted, effective energy-saving upgrades.
| Area of Inspection | What to Check For | Potential Fix | Notes / Findings |
|---|---|---|---|
| Exterior | Cracks in foundation/siding, gaps around pipes/vents | Caulk, expanding foam sealant | |
| Windows & Doors | Worn weatherstripping, cracked caulk, draftiness (dollar bill test) | Replace weatherstripping, re-caulk, install door sweeps | |
| Living Areas | Cold spots on walls, drafty outlets/switches | Seal outlets with foam gaskets, add insulation to walls | |
| Lighting | Incandescent or halogen bulbs in use | Upgrade to LED bulbs | |
| Appliances | Refrigerator/freezer temperature settings too cold | Adjust thermostat to recommended levels | |
| HVAC System | Dirty air filter | Clean or replace the filter (monthly check) | |
| Water Heater | Temperature setting (above 120°F), uninsulated pipes | Lower temp to 120°F, install pipe insulation sleeves | |
| Ductwork | Visible gaps, disconnected joints, signs of air leaks | Seal joints with mastic sealant or foil tape | |
| Attic | Insulation depth (can you see joists?), air leaks, attic hatch seal | Add more insulation, air seal penetrations, insulate hatch |
After you've gone through each area, you’ll have a clear, prioritized list of what needs to be fixed. It’s all about tackling the biggest problems first to get the best return on your effort.
Inspect the Attic and Crawlspace
Finally, it's time to head up to the attic. In my experience, this is where you’ll often find the biggest opportunities for energy savings. The number one thing to check is the insulation depth. The rule of thumb is simple: if you can easily see the tops of your ceiling joists, you almost definitely need more insulation.
While you're up there, look for any signs of moisture or mold, which could point to bigger ventilation issues. Make sure soffit vents aren't blocked by insulation. Also, hunt down any unsealed gaps around recessed lights, plumbing pipes, or the chimney. These act like highways for your warm, conditioned air to escape right out of the house.
Pro Tip: Don't forget to inspect the attic hatch or access door itself. It's a classic weak point. If it's just a flimsy piece of plywood, it's like having a small, uninsulated window in your ceiling. A proper access point should be insulated and weatherstripped to create a tight, lasting seal.
Turning Your Findings into an Action Plan
You've done the hard work. You’ve gone through your home with a fine-toothed comb, and now you have a clipboard full of notes about drafts, insulation gaps, and power-hungry appliances. It’s easy to feel a little overwhelmed at this point. So, what’s next?
The real magic happens when you turn that raw data from your audit into a clear, prioritized action plan. This isn't about tackling everything at once. The key is to sort your findings strategically so you can make smart choices that fit your budget and give you the best return on your investment.
Prioritize with Quick Wins and Long-Term Projects
The most effective way to get started is to split your to-do list into two camps: the low-hanging fruit and the bigger investments. This approach cuts through the noise and helps you build momentum right away.
-
Quick Wins (Low Cost, High Impact): These are the easy, often DIY, fixes you can knock out over a weekend. We're talking about sealing drafty windows with weatherstripping, popping foam gaskets into outlets on exterior walls, or wrapping your water heater pipes with inexpensive insulation sleeves.
-
Long-Term Projects (Higher Cost, Major Impact): This bucket holds the heavy hitters. Things like adding significant attic insulation, replacing old single-pane windows, or upgrading to new, high-efficiency appliances fall into this category. They require more planning and a bigger budget but deliver substantial savings for years to come. For ideas on these larger upgrades, you can explore our guide to the https://automatedhomeguide.com/best-energy-efficient-appliances/.
A Pro Tip from Experience
Prioritizing like this helps you see immediate results, which is incredibly motivating. When you knock out a few quick wins and feel the difference (or see it on your next utility bill), you build the confidence to tackle the bigger projects down the road.
This methodical approach isn’t just for homeowners. Consider that in 2021, the industrial sector accounted for a staggering 33% of total energy use in the United States. To manage that kind of consumption, large organizations rely on regular inspections and detailed checklists to monitor performance and implement effective upgrades—a principle that works just as well for your home.
Using an Energy Upgrade Priority Matrix
To really get a handle on your priorities, a simple comparison chart can make your choices crystal clear. When you put the estimated cost right next to the potential savings, you can immediately see where to start for the biggest bang for your buck. This is a crucial final step in making your home energy audit checklist truly useful.
I've put together a simple matrix to help you compare common energy efficiency upgrades. Think of it as a template to structure your own action plan based on what you found during your inspection.
Energy Upgrade Priority Matrix
| Upgrade | Estimated Cost | Annual Savings Potential | Payback Period |
|---|---|---|---|
| Air Sealing & Weatherstripping | $50 – $300 | $50 – $200 | 1-2 years |
| Add Attic Insulation | $1,500 – $3,500 | $200 – $600 | 3-6 years |
| Upgrade to LED Lighting | $100 – $400 | $100 – $225 | 1-2 years |
| Install a Smart Thermostat | $150 – $300 | $100 – $150 | 1-2 years |
| Replace Old Windows | $5,000 – $15,000+ | $125 – $450 | 10+ years |
By using this structured approach, your audit findings transform from a simple list of problems into a powerful roadmap. You now have a clear path toward a more comfortable, affordable, and energy-efficient home.
When to Call in a Professional Auditor
https://www.youtube.com/embed/oAvKgkiDfQs
Going through your own home energy audit is a fantastic first step. Seriously, it gives you a real, hands-on feel for where your energy dollars are slipping away. You'll likely uncover and fix quite a few common problems all by yourself.
But it’s also important to know when you've hit the limits of a DIY approach. Some energy-wasting issues are just too subtle or complex to spot without specialized gear and a trained eye. To really dial in your home’s performance and unlock the biggest savings, sometimes you have to call in a certified professional. They have the tools to make the invisible, visible.
The Specialized Tools Pros Bring to the Job
A professional auditor shows up with a lot more than just a keen eye and a flashlight. Their diagnostic equipment can pinpoint problems with a level of precision that’s simply out of reach for a DIY audit.
-
Blower Door Test: This is the big one. An auditor fits a powerful fan into an exterior door frame and uses it to pull air out of your house, creating a slight negative pressure inside. This makes outside air rush in through every single tiny crack and gap, no matter how small. They can then measure your home's overall leakiness and find the exact sources of hidden drafts. It’s a total game-changer for air sealing.
-
Thermographic Scan: Think of this as giving the auditor heat-vision goggles. They use a sophisticated infrared camera to scan your walls, ceilings, and floors. This creates a color-coded heat map of your home, instantly revealing cold spots where insulation is missing or has slumped down inside a wall cavity. It can also show where heat is escaping around window frames or through your attic.
These tests aren't about guesswork; they provide hard data. You’d be surprised what they uncover in places you would never think to check, like behind drywall or in a complicated roofline.
A professional audit doesn't just find problems—it quantifies them. Getting a specific number for your home's air changes per hour (ACH) from a blower door test gives you a concrete benchmark. It helps you see where you stand and prioritize the sealing projects that will have the biggest impact.
Deciding When to Make the Call
While a DIY walkthrough is always a great idea, there are definitely times when investing in a pro is the smarter move. If you’re dealing with stubborn issues or getting ready for a big project, a professional assessment is well worth the cost.
You should seriously consider hiring an auditor if:
- You're Planning a Major Renovation: Before you spend a fortune on a new HVAC system or high-end windows, an audit can tell you if you're about to put that expensive new equipment into a leaky, inefficient building envelope. It's about getting the foundation right first.
- You Have Persistent Comfort Issues: Are some rooms always freezing in the winter or sweltering in the summer, no matter what you do? This often points to deeper issues with insulation or ductwork that a pro can diagnose.
- You Need Official Documentation: Many utility rebate programs, tax credits, or green home improvement loans require a report from a certified energy auditor to prove your home's performance and qualify you for the incentive.
Think of a professional audit as the perfect follow-up to your own efforts. It provides that deep-dive analysis you need to tackle the toughest energy hogs, making sure your home improvement investments truly pay off in both comfort and savings.
Common Questions About Home Energy Audits
Even with a detailed checklist in hand, you probably still have a few questions rolling around in your mind. That’s perfectly normal. Getting those last few uncertainties cleared up is the final piece of the puzzle, giving you the confidence to start making real changes.
Let's tackle some of the most common questions I hear from homeowners.
How Often Should I Do This?
This is probably the number one question. For a DIY walkthrough like the one we just covered, I recommend doing it once a year. The fall is a great time, right before the winter heating season kicks in, as it helps you catch any new drafts or issues that cropped up over the summer.
A full professional audit, however, is a different beast. You definitely don’t need one every year. Think of it as a major diagnostic tool you bring out for specific situations. It's a smart move before a big renovation, right after you buy a new house, or when you’re dealing with stubborn comfort issues that just won't go away.
What Should I Expect from a Professional Audit?
When you call in a pro, you're getting a much deeper dive than what you can do on your own. Your DIY inspection is all about visual cues and common-sense checks. A professional brings in the heavy equipment. Expect them to be at your home for a few hours, gathering hard data, not just making observations.
Here's what a certified energy auditor will typically do:
- Dig into Your Bills: They'll start by analyzing your past utility bills. This gives them a baseline and helps them understand your home's unique energy-guzzling habits.
- Run a Blower Door Test: This is the gold standard for finding air leaks. They'll mount a powerful fan in an exterior doorway to depressurize your house, which makes it easy to pinpoint exactly where outside air is sneaking in.
- Use an Infrared Camera: A thermographic scan is like giving your home an x-ray for heat. The camera lets them literally see heat escaping through walls and find hidden gaps in your insulation.
Afterward, you won't just get a handshake and some verbal tips. You’ll receive a comprehensive written report. This document will detail their findings and give you a prioritized action plan, often with estimated costs and projected savings for each upgrade.
Key Takeaway: A professional audit doesn't just find problems—it quantifies them. This data-driven approach is essential when you're trying to decide whether to make big-ticket investments like replacing windows or upgrading your entire HVAC system.
Is It Worth the Cost?
This is where the rubber meets the road. A professional audit can run you anywhere from $200 to over $500, depending on the size of your house and the scope of the tests. It’s not cheap, but it’s better to think of it as an investment that can pay for itself many times over.
By pinpointing the most critical energy vampires, a pro audit ensures your money goes where it will make the biggest difference. Instead of guessing, you're acting on data. The U.S. Department of Energy estimates that making the fixes identified in a professional audit can slash a homeowner's energy bills by up to 30%. It doesn't take long for those monthly savings to eclipse the initial cost of the audit. You're spending a little now to save a lot later.
At Automated Home Guide, we believe that a smarter home is a more efficient home. For more expert advice on optimizing your living space with the latest technology, explore our resources at https://automatedhomeguide.com.


Leave a Reply