
While wireless gadgets are undeniably convenient, the real secret to a bulletproof, high-performance smart home is hidden in the walls. Getting the wiring for home automation right from the start is the single most important step you can take. It’s the central nervous system that ensures everything from your security cameras to your sound system works without a hitch.
The Foundation of a Truly Smart Home: Why Wiring Matters
Let's cut through the "everything wireless" hype for a second. While Wi-Fi is great for your phone and tablet, it has some serious limitations when it comes to a fully integrated home. Signal congestion from your neighbors, interference from your own microwave, and even thick plaster walls can create frustrating lag or total dropouts—usually at the worst possible moment.
Ever had your high-definition security camera feed start to pixelate and freeze just as someone approached your door? Or your smart lights suddenly refuse to respond? Those are classic symptoms of a home straining its wireless network. A smart wiring plan is the cure, giving your most critical devices their own dedicated, high-speed highway.
Unlocking Rock-Solid Stability and Performance
A hardwired connection delivers a level of stability and speed that Wi-Fi just can't touch. This is especially true for anything that needs a lot of bandwidth or a connection that absolutely cannot fail. By running cable to your key devices, you build a robust backbone for your entire smart home ecosystem.
This approach pays off in a few huge ways:
- Unwavering Reliability: Wired connections don't care about Wi-Fi dead zones or signal interference. Your security system, media streamers, and core controllers will just work. Every single time. We dive deeper into this in our guide comparing wireless vs. wired security systems.
- Blazing Speed: An Ethernet cable will always beat Wi-Fi for raw data speed. This is non-negotiable for smooth 4K video streaming, lag-free gaming, and getting that instantaneous response when you tap a button on your control panel.
- Tighter Security: It's much harder for someone to tap into a physical wire than it is to hack a wireless network. For things like security cameras, a wired connection is simply a more secure choice.
- A Clearer Wi-Fi Signal: By moving all your stationary, data-hungry devices (like your TV, Apple TV, and desktop computer) onto wires, you free up the airwaves. This leaves more bandwidth for the devices that are actually mobile, like your laptop and phone, making them faster and more reliable, too.
Future-Proofing Your Investment
The smart home isn't a fad; it's a fundamental shift in how we live. The market is exploding—the North American home automation market, valued at USD 19.79 billion in 2025, is on track to hit USD 25.74 billion by 2030. Homeowners are increasingly demanding integrated systems for security, comfort, and energy management. You can see the full breakdown of the home automation market's impressive growth on MarketsandMarkets.com.
By investing in a solid wiring plan today, you’re not just solving today's problems—you're getting your home ready for whatever comes next.
Think of your home's wiring as its circulatory system. It delivers the power and data necessary for every smart device to function at its peak, creating a cohesive and intelligent environment that responds instantly to your needs.
Designing Your Smart Home Wiring Blueprint
Jumping straight into pulling cables without a plan is a classic rookie mistake—one that almost always leads to frustration and having to cut into perfectly good drywall later. A thoughtful wiring blueprint is your single most important document for this project. Think of it as the roadmap that guarantees every smart device gets the connection it needs, right where you want it.
Don't worry, you don't need a professional CAD drawing. A simple sketch of your home's floor plan, marked up with your ideas, is all it takes to get started. The real goal is to see the finished project in your mind's eye before you drill a single hole. This planning is critical whether you're building from scratch or retrofitting an older home, but it's exponentially easier (and cheaper) to do it during construction.
This process flow shows how a solid wired foundation solves the most common smart home headaches, paving the way for a system that just works.
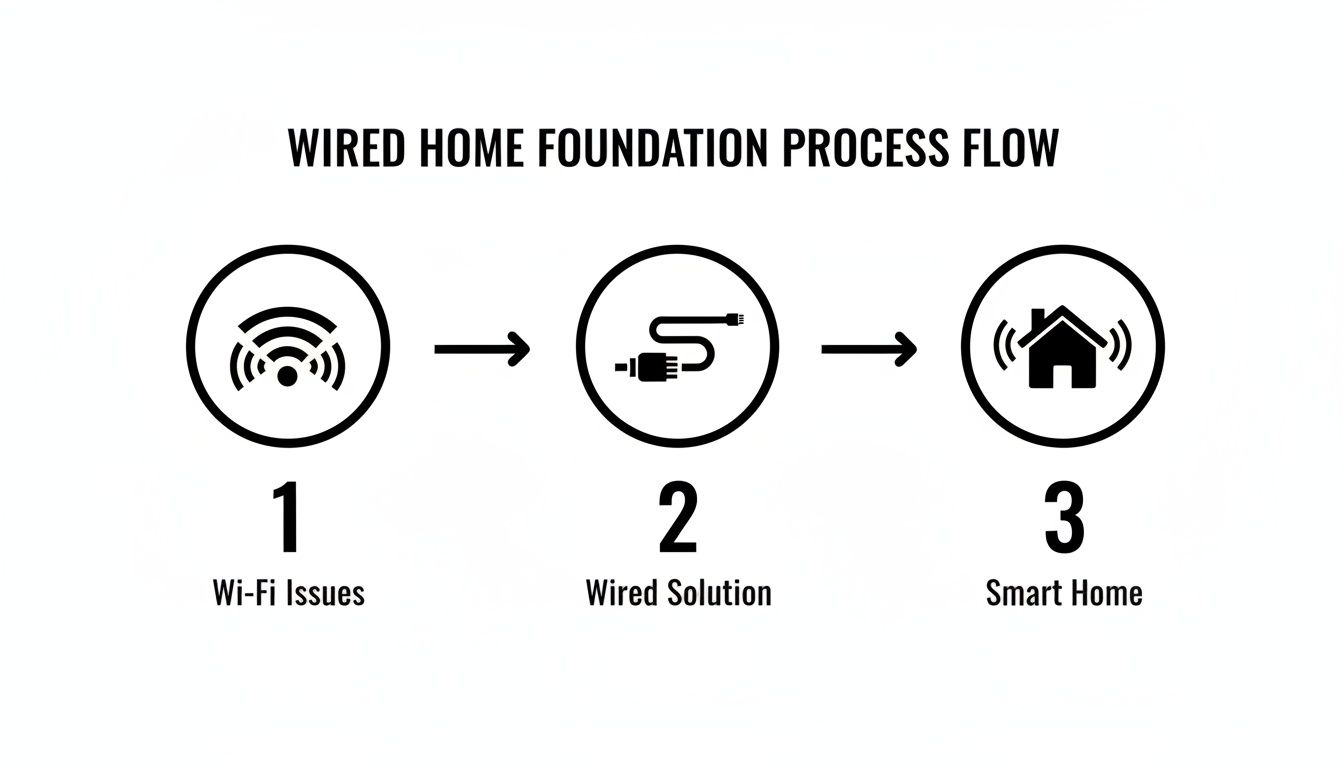
As you can see, making the move from spotty Wi-Fi to a dedicated wired network is the fundamental step toward a responsive and truly "smart" home.
Adopt a Room-By-Room Strategy
The best way to start is to grab a notepad and walk through your house, one room at a time. In each space, jot down every smart device you have now and every one you might want in the future. Don't hold back—it’s far better to run a few extra cables now than to wish you had them in a couple of years.
Think through common device placements:
- Living Room: Where are the TV, media streamer, soundbar, and gaming consoles going? I always plan for at least four Ethernet ports behind the main media center. Thinking about in-ceiling speakers for Dolby Atmos? Now's the time to map that speaker wire.
- Kitchen: A wall-mounted tablet for recipes or a smart display on the counter can be incredibly useful. A dedicated Ethernet drop here ensures a flawless connection, even when you're streaming a cooking video.
- Home Office: This is mission control. Plan for a minimum of two to four Ethernet ports for your computer, printer, and any network-attached storage (NAS) you might have.
- Bedrooms: Even if you're all-in on Wi-Fi today, running a single Ethernet port to each bedroom is a savvy move for future-proofing. It’s perfect for a 4K media streamer or a smart TV that needs a stable connection.
- Exterior & Ceilings: Walk the perimeter and look up. Pinpoint the ideal spots for PoE security cameras, a video doorbell, and, crucially, your Wi-Fi access points. Remember, access points deliver the best performance when they're centrally located and mounted high up on a ceiling.
Plan for Systems and Future Growth
Once you have your device list, start thinking in terms of integrated systems. Where will you put the keypads for your security system? What about the low-voltage wiring for motorized shades? Mapping out motion sensors in hallways? Grouping these devices by function helps you see how the cable runs will flow together.
The real magic of a wiring blueprint is future-proofing. My go-to pro tip: run an empty conduit alongside your main cable bundle to key areas like the entertainment center or home office. It costs next to nothing now but makes adding a new type of cable in five years an absolute breeze.
This kind of foresight is what separates a good installation from a great one. The smart home automation market is exploding—it was valued at USD 132.65 billion in 2025 and is projected to skyrocket to USD 1,359.21 billion by 2035. This growth is being driven by the demand for reliable, wired networks that can support an ever-increasing number of sensors and controllers. You can see the full market analysis over at Precedence Research. Your wiring plan is a direct investment in that future.
The Central Hub: Your Media Panel
Every well-designed smart home needs a central nervous system. This is your structured media panel—a dedicated enclosure, typically tucked away in a utility closet, basement, or garage, where every low-voltage cable in your home comes together.
This hub is more than just a tidy box; it’s a strategic command center with huge benefits:
- Organization: It keeps every connection neatly organized and labeled, preventing the dreaded "spaghetti monster" of tangled wires behind your gear.
- Troubleshooting: When a camera or speaker stops working, you have one central spot to test connections and figure out the problem quickly.
- Flexibility: Your network switch, modem, and other core hardware live here, making it simple to upgrade your entire network backbone without ever opening up a wall.
When you're choosing a spot for the media panel, make sure it has access to a dedicated power outlet and enough space for ventilation. Planning this central point is the final, crucial step in creating a blueprint that will serve your smart home for years to come.
Choosing the Right Wires for Each Smart Device
Stepping into the cable aisle can feel like decoding a foreign language. With dozens of spools labeled with cryptic codes like "18/4" or "RG6 Quad-Shield," it's easy to grab the wrong thing. A successful home automation project hinges on using the right cable for the right job—it's the foundation for reliability, performance, and safety.
This isn't about memorizing complex electrical engineering specs. It's about understanding a few key types of wire and knowing where they fit into your smart home plan. Get this part right, and your security camera feed will be crystal clear, your in-ceiling speakers will sound incredible, and your data network will be lightning-fast for years to come.

The Network Backbone: Ethernet Cable
Think of your Ethernet network as the data superhighway for your home. For any device that absolutely needs a fast, stable internet connection—like a 4K media streamer, a home office PC, or a network video recorder (NVR)—a wired connection is simply non-negotiable.
Cat6 vs. Cat6a: What You Really Need to Know
- Category 6 (Cat6): This has been the go-to standard for years. It supports data speeds up to 10 Gigabits per second (Gbps), but only over shorter distances of about 164 feet. For most homes, it's perfectly capable for connecting TVs, gaming consoles, and Wi-Fi access points.
- Category 6a (Cat6a): The "a" stands for "augmented." This is a definite step up, supporting 10 Gbps speeds over the full 328-foot (100-meter) length of a standard cable run. It also features better shielding to cut down on interference from other wires, making it a much more robust choice.
My personal recommendation? Run Cat6a whenever you can, especially to your home office and main entertainment center. The cost difference is minimal during construction, but it gives you a future-proof foundation for whatever tech comes next.
A critical pro tip: Always buy solid copper conductor Ethernet cable, not the cheaper copper-clad aluminum (CCA). CCA wire is brittle, breaks easily, and performs poorly, especially when you start using Power over Ethernet. The box should explicitly say "Solid Bare Copper."
Power and Data in One: Power over Ethernet (PoE)
Power over Ethernet (PoE) is one of the most useful technologies you can leverage in a smart home. It allows a single Ethernet cable to carry both data and low-voltage electrical power to a device, which dramatically simplifies installation for a whole range of gadgets.
You'll find PoE is a lifesaver for devices like:
- IP security cameras
- Wi-Fi access points
- Wall-mounted control touchscreens
- Video doorbells
By running a single Cat6 or Cat6a cable to a camera location, you completely eliminate the need for a nearby power outlet. The power itself comes from a PoE-enabled network switch or a power injector located back at your central wiring panel.
Multi-Conductor Wires for Control and Sensors
Not every smart device needs a firehose of data. Many just require simple low-voltage power and a way to send basic signals. This is where multi-conductor security wire comes into play. These cables bundle several smaller insulated wires inside a single jacket.
The name tells you exactly what you're getting. An 18/4 cable, for instance, has four individual wires of 18-gauge thickness. Remember, the lower the gauge number, the thicker the wire.
Here are a few common real-world uses:
- Security Keypads and Motion Sensors: These typically use 22/4 or 18/4 wire. Two wires handle power (positive and negative), and the other two create the data zone connection back to the alarm panel.
- Smart Thermostats: Most modern thermostats need a "C-wire" (common wire) for continuous power. If your existing wiring is missing one, running a new 18/5 or 18/8 thermostat wire is the cleanest solution. Speaking of wiring challenges, if you're dealing with tricky lighting setups, our guide to installing a Wi-Fi light switch without a neutral wire can offer some helpful insights.
- Motorized Shades: While many shades are battery-powered these days, a hardwired solution is far more reliable. Running a simple 18/2 wire from the window frame to a central power supply means you'll never have to climb a ladder to change batteries again.
Wiring for Audio and Video
For your entertainment system, using specialized cables is the only way to maintain pristine signal quality.
Speaker Wire
For in-wall or in-ceiling speakers, you'll need CL2 or CL3-rated speaker wire, which is certified for safe installation inside walls. The most important factor here is the gauge.
- 16-gauge: Perfect for shorter runs (under 50 feet) to standard bookshelf or ceiling speakers.
- 14-gauge: A better choice for longer runs or more power-hungry floor-standing speakers.
- 12-gauge: The best option for very long runs (over 100 feet) or high-end, demanding home theater speakers.
Coaxial Cable (RG6)
While streaming is king, coaxial cable is still vital for cable TV, satellite, and most importantly, your cable internet modem. To ensure you get a flawless signal, always use RG6 Quad-Shield coaxial cable. The extra layers of shielding protect the signal from interference, which helps prevent pixelation on your TV and frustrating internet dropouts.
Getting Geared Up: Essential Tools and Safety for Your Wiring Project
Taking on a DIY home automation wiring project can be incredibly satisfying, but a successful outcome really boils down to two things: having the right tools and a serious commitment to safety.
Before you even think about pulling a single wire, you have to know your limits. When it comes to anything involving 120V mains power—we're talking smart switches, outlets, or tying into your home's breaker panel—the only smart move is to hire a licensed electrician. This isn't just friendly advice; it's a non-negotiable step for safety and staying on the right side of the law.
For an even deeper look into the rules of the road for high-voltage work, check out our guide on smart home electrical installation.
The Low-Voltage DIYer's Toolkit
With that critical line drawn in the sand, let's talk about the low-voltage side of things. This is where a well-prepared DIYer can really get their hands dirty and build a rock-solid network foundation. The right equipment doesn't just make the job go faster; it ensures your connections are reliable for years to come.
To tackle a project like this, you'll need more than just a screwdriver. Here’s a rundown of the core tools I've found to be indispensable for countless low-voltage wiring jobs.
| Tool Category | Essential Tools | Purpose |
|---|---|---|
| Cable Pulling & Routing | Fish Tape, Glow Rods | For navigating wires through walls, ceilings, and conduit without frustration. |
| Cable Preparation | Wire Strippers, Cable Cutters | Ensures clean, precise cuts and strips on various low-voltage cables (Ethernet, speaker, security). |
| Ethernet Termination | RJ45 Crimper, Punch-Down Tool | Absolutely mandatory for attaching connectors and terminating wires into keystone jacks. |
| Drilling & Access | Cordless Drill with Auger & Spade Bits | For creating clean pathways through wooden studs and floor joists. |
| Safety & Inspection | Voltage Tester, Stud Finder, Headlamp | Non-negotiable for verifying power is off, locating studs, and keeping your hands free. |
Having these tools ready before you start will make the difference between a smooth, professional-looking installation and a project that becomes a major headache. Equipping yourself with the right essential electrical safety tools isn't just about efficiency—it's about protecting yourself and your home.
Playing by the Rules: Safety and Code Compliance
Safety is about more than just avoiding a shock. A proper installation won't create a fire hazard and will pass muster with local building codes. This is where knowing your cable ratings is absolutely crucial.
Why Cable Fire Ratings Matter
You can't just run any old cable inside your walls. The plastic jacket on wires can release toxic smoke during a fire, which is why building codes mandate specific cable types for different installation areas.
- CMP (Plenum-Rated): This is the top-tier fire rating. You must use plenum-rated cable for any runs through "plenum" spaces—these are areas used for air circulation, like the space above a drop ceiling or inside some HVAC ductwork.
- CMR (Riser-Rated): This cable is designed for vertical runs that pass between floors, such as through a utility closet. Its job is to prevent a fire from climbing the cable from one floor to the next.
- CM/CMG (General Purpose): This is your standard, day-to-day cable for residential in-wall use, as long as it doesn't cross floors or enter a plenum space.
A Pro Tip from the Field: When drilling through wall studs, always aim for the dead center. This one simple habit dramatically reduces the chances of someone accidentally driving a drywall screw or a nail through your precious low-voltage cables down the road.
While the DIY market is growing fast—projected at a 17.90% CAGR while professionally installed systems hold a 52.90% market share—doing it yourself means taking responsibility for code compliance. The global market, valued at USD 104.58 billion in 2025 and expected to hit USD 211.21 billion by 2031, shows just how many people are getting into this space.
Always, always check your local building codes before you start, as the rules can vary. Another key step is to use fire-rated caulk or putty to seal any holes you drill between floors or through a firewall (like the one into your garage). This maintains your home’s fire barrier and is a small detail that inspectors look for.
Testing and Troubleshooting Your New Wiring Network
You’ve pulled the last cable, and the walls are still open. This is the moment of truth. Before a single piece of expensive gear gets connected, it's absolutely vital to test every single wire you’ve run. This isn't just a suggestion; it's the professional habit that separates a rock-solid smart home from one that’s a constant source of glitchy frustration.
Skipping this step is easily one of the biggest mistakes you can make. Finding and fixing a bad punch-down or a shorted wire right now takes a few minutes. Discovering that same problem after the drywall is up, painted, and your new media center is in place? That's a nightmare that can take hours, or even days, to resolve. Think of this as your final quality check.
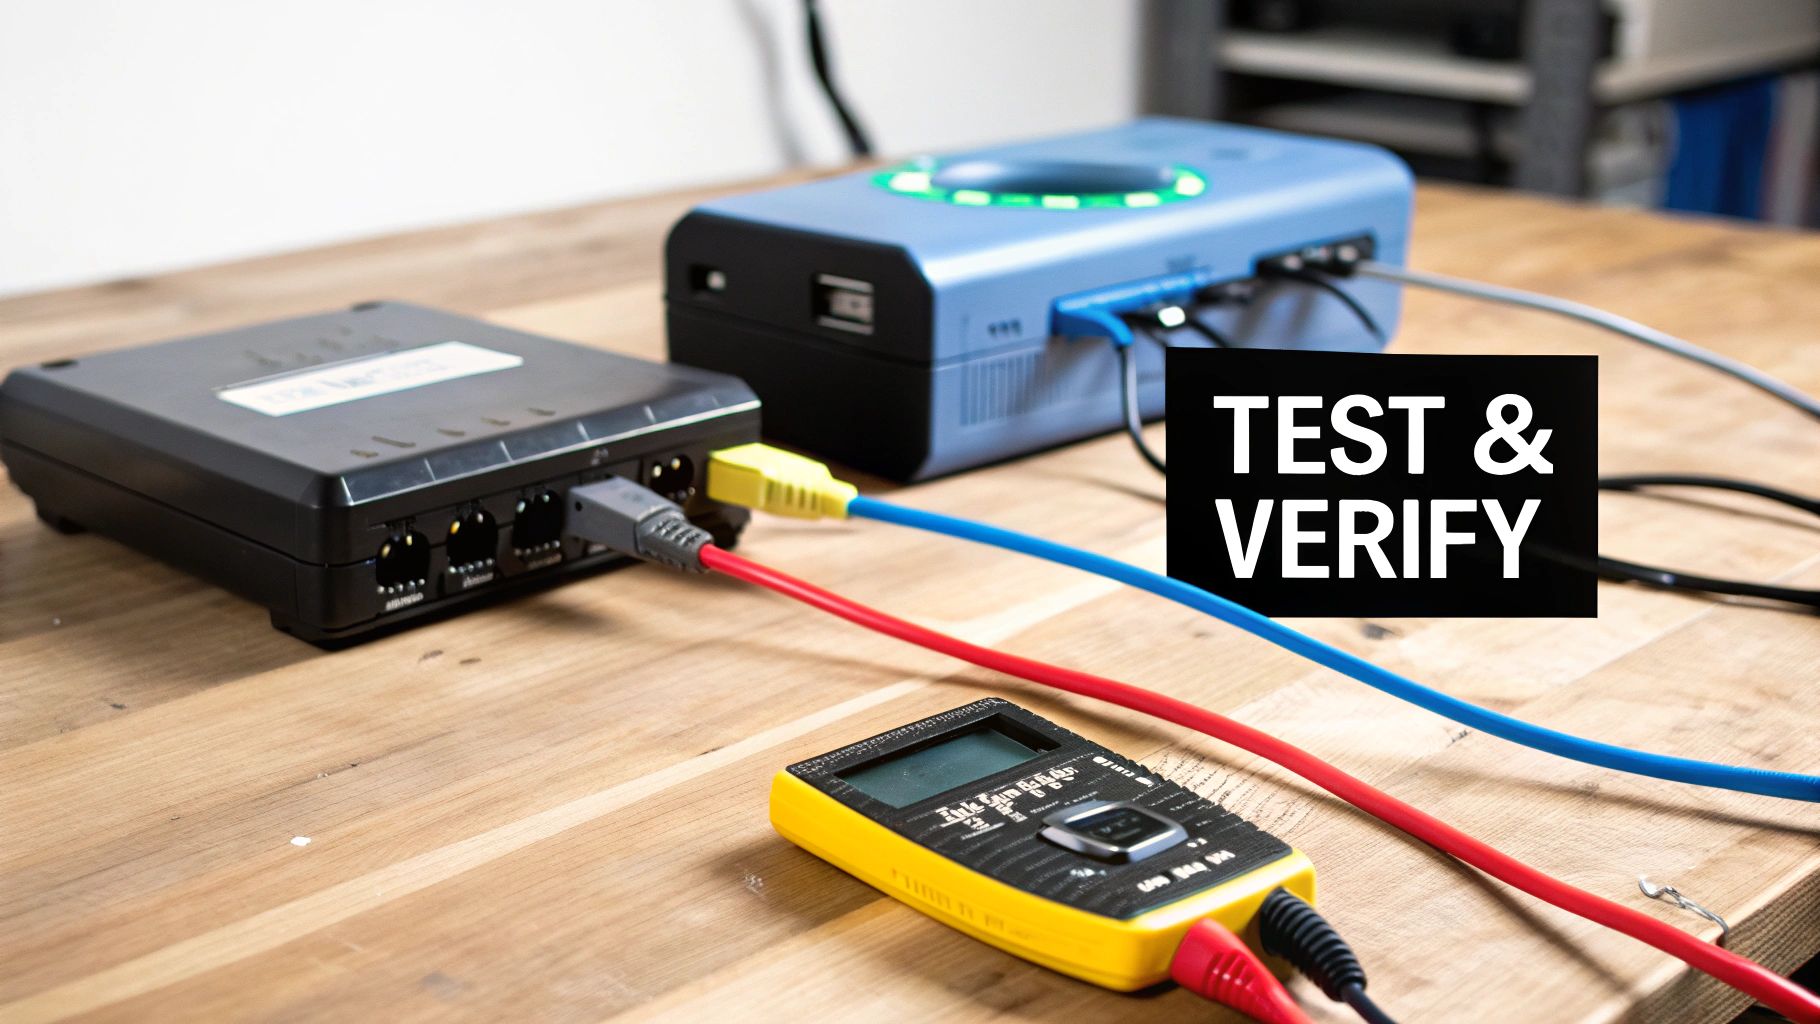
Verifying Ethernet and Data Lines
For all your Ethernet runs, a basic network cable tester is your best friend. These things are cheap—usually under $30—and invaluable. It's a simple two-part tool: a main unit and a remote terminator. Just plug one end of the cable into the main unit, the other into the remote, and watch the lights.
The tester zips through each of the eight tiny wires inside the cable, instantly telling you what you need to know. You'll see if you have a good connection, an open circuit (a wire isn't connected), a short (wires are touching), or a miswire (you mixed up the color order). This quick pass/fail check gives you the confidence that your data lines are ready to go.
Checking Low-Voltage Power and Control Wires
When it comes to your other low-voltage runs, like speaker or security cables, a multimeter is the tool for the job. You'll mostly be using its continuity setting. This function sends a tiny electrical signal down one wire to see if it makes it out the other end.
If the multimeter beeps, you know the wire is intact from point A to point B. This is perfect for figuring out which speaker wire in a bundle goes to the left surround sound speaker or for making sure there are no breaks in the cable for your alarm keypad. Knowing how to test continuity with a multimeter is a core skill for any wiring project.
Take it from someone who learned the hard way: label every single cable at both ends. Use a fine-tip permanent marker or a label maker. A tag that reads "LR-SPKR-L" (Living Room – Speaker – Left) might feel tedious now, but it will save you from an epic headache down the road.
Solving Common Real-World Problems
Even the most careful installer runs into issues. Here’s a look at a couple of common scenarios you might face when you start hooking up your devices.
Scenario 1: The PoE Camera Won't Power On
- Check the Connection: The first move is always to re-test the Ethernet cable. A single wire not making solid contact in the RJ45 jack can kill the Power over Ethernet link, even if data seems to work.
- Verify the Power Source: Is your network switch actually a PoE-capable model? If not, you'll need a PoE injector. Also, double-check the camera’s power specs (PoE, PoE+, PoE++) to make sure your switch or injector can supply enough juice.
Scenario 2: A Data Port is Slow or Unreliable
- Re-terminate Both Ends: A sluggish or flaky connection is often the classic sign of a bad termination. One of the eight wires might be barely hanging on. Just snip off the old connectors and punch down or crimp new ones on both ends.
- Look for Kinks or Damage: Did the cable get bent too sharply around a stud or stapled too tightly? Physical damage is a performance killer. This is exactly why we test before the walls are sealed up.
By testing every connection methodically and knowing how to tackle these common hiccups, you’ll ensure your smart home’s nervous system is flawless from day one.
Common Questions About Home Automation Wiring
Getting into a home automation wiring project can feel a little daunting, and it's totally normal to have questions. You might be wondering if you really need all these wires, how much it's all going to cost, or even where to start. Let's tackle some of the most common questions I hear from people planning their smart homes.
Can't I Just Use Wi-Fi for My Smart Home?
Sure, today's Wi-Fi is powerful, but relying on it for absolutely everything is a classic mistake. When you overload your wireless network, you create digital traffic jams. This is what causes those annoying delays, buffering video feeds, and devices that just drop offline for no reason.
Think of it this way: Wi-Fi is a shared resource. For the things that absolutely must work—like your security cameras, a media server streaming a 4K movie, or the main touchscreen that runs your house—a dedicated wired connection is a game-changer. It’s their own private, high-speed lane, guaranteeing them the performance they need, 100% of the time.
The smartest approach is a hybrid one. Hardwire your stationary, high-bandwidth, or mission-critical devices. This frees up your Wi-Fi to deliver a much better experience for the things that are actually mobile, like your phone, tablet, and laptop.
Is It Expensive to Wire a House for Home Automation?
The cost really boils down to one simple question: are your walls open or closed? If you’re building a new home or in the middle of a major gut-renovation, the cost to run all this structured wiring is surprisingly low. With easy access, you're mostly just paying for the bulk cable itself, not a ton of labor.
Retrofitting an existing home is a whole different ballgame. It’s far more labor-intensive, often involving fishing wires through tricky spaces and then patching up drywall. That's where the costs can really add up.
But even then, look at it as a long-term investment. You can keep costs down by running the low-voltage cables yourself and sticking to a smart, focused plan. The rock-solid reliability you'll get from your smart home will be worth it for years to come, and it definitely adds real value to your property.
Think of pre-wiring during construction not as an expense, but as an investment in your home's future. Spending a little now can save you thousands in labor and headaches when you want to add more advanced tech down the road.
What’s the Single Most Important Wire for Future-Proofing?
If you could only run one type of cable to set your home up for the future, make it Category 6a (Cat6a) Ethernet. No question about it. This cable is the undisputed champion of versatility. It handles insane data speeds up to 10 Gbps and plays nicely with all your older, slower gear.
My rule of thumb is to run at least two Cat6a cables to every key spot—behind the TV, in the home office, at every potential security camera location. Doing this prepares your home for almost any technology coming down the pipeline.
This one cable can handle it all:
- High-Speed Data: For your computers, media streamers, and game consoles.
- High-Definition Video: Easily distributes 4K and even 8K video.
- Power: Delivers power to devices with Power over Ethernet (PoE).
- Control Signals: Serves as the backbone for countless control systems.
Even if you don't need all that bandwidth today, having it in the walls means you won't be tearing them open in five or ten years just to keep up.
Do I Need an Electrician for All This Wiring?
This is a really important distinction, both for safety and for staying on the right side of the law. You absolutely must hire a licensed electrician for anything involving your home's mains power (120V/240V). That means installing smart light switches, dimmers, or new outlets. Line-voltage electricity is no joke and is heavily regulated by building codes.
However, almost all the other wiring we're talking about in this guide is low-voltage. This is your Ethernet, speaker wire, security system cables, and thermostat wires. In most areas, a careful and competent DIYer is perfectly allowed to run this type of wiring themselves.
Always double-check your local building codes to be sure, but the rule is pretty clear: if it’s low-voltage, you can probably tackle it. If it connects to your breaker panel, call a pro.
At Automated Home Guide, we're here to help you build a smarter, safer, and more connected home. For more expert tips and in-depth guides, check out our resources at https://automatedhomeguide.com.


Leave a Reply