

Diving into a home automation installation is your ticket to a more streamlined, secure, and efficient home. It's all about connecting different devices—from your lights to your thermostat—so you can manage them from anywhere. And honestly, it's more doable than ever, whether you're itching for a weekend DIY project or prefer to call in a pro.
Starting Your Smart Home Journey The Right Way
The phrase "smart home" might make you think of complicated, sci-fi setups, but getting your feet wet is surprisingly simple. This isn't just about collecting cool gadgets; it's about building a home that actively responds to your needs and makes your daily life a little bit easier.
And it’s clear this is more than just a passing trend. The home automation market was already valued at USD 54.30 billion in 2024 and is expected to climb to USD 80.83 billion by 2032. As reported by Data Bridge Market Research, that massive growth shows just how many people are realizing the real-world benefits, especially when it comes to security and smarter energy use.
Figure Out Your "Why" First
Before a single device ends up in your online shopping cart, stop and ask yourself the most important question: What problem am I trying to solve? Your answer is your roadmap. A great smart home setup is built with purpose, which keeps you from wasting money on tech that doesn't actually help you.
Think about what you want to achieve. Most people's goals fall into a few key buckets:
- Better Security: You might want smart locks, a video doorbell, or motion-sensing cameras to keep an eye on things.
- More Convenience: Imagine automating your lights, adjusting the thermostat from bed, or using your voice to control your TV.
- Lower Energy Bills: Smart thermostats that learn your habits and smart plugs that kill power to devices on standby are perfect for this.
Pick one area to start. Maybe you begin with smart lighting in the living room. Once you're comfortable with that, you can expand your system room by room.
My Two Cents: The best smart homes I've seen were built with intention. They tackle real, everyday annoyances. Start with a pain point—like wondering if you locked the front door or cringing at your electric bill—and build out from there.
Getting to Know the Key Players
At its core, every smart home needs a few essential components to function. The central piece is often a smart hub, which acts as the brain of the whole operation. This little box is what allows all your different devices, which might use different communication languages like Wi-Fi, Zigbee, or Z-Wave, to understand each other.
To help you visualize what you'll need, here’s a quick breakdown of the core components.
Key Components for Your Smart Home Installation
| Component Category | Primary Function | Example Devices |
|---|---|---|
| Smart Hub / Controller | The central brain that connects and manages all your devices. | Amazon Echo, Google Nest Hub, Apple HomePod, Hubitat Elevation |
| Smart Lighting | Allows for remote control, scheduling, and dimming of lights. | Philips Hue Bulbs, Lutron Caséta Dimmers, Wyze Bulbs |
| Climate Control | Automates heating and cooling to save energy and improve comfort. | Nest Thermostat, Ecobee Smart Thermostat, Smart Vents |
| Security & Safety | Monitors your home for intruders, smoke, and water leaks. | Ring Video Doorbell, Arlo Security Cameras, SimpliSafe Sensors |
| Smart Plugs & Outlets | Makes "dumb" appliances smart by controlling their power. | Kasa Smart Plug, Wemo Smart Plug, Eve Energy |
Think of your smart home as an orchestra. The hub is the conductor, making sure every instrument (your smart device) plays its part at the right moment. Your smartphone is the baton, giving you command over the entire performance. Understanding this basic structure is the first step toward a successful home automation installation. For a deeper look at the fundamentals, our guide on setting up a smart home is a great place to start.
Designing Your Smart Home Blueprint
Jumping straight into buying gadgets is the single biggest mistake I see people make. A truly smart, frustration-free home is built on a solid plan, not just a pile of boxes from Amazon. This initial planning phase is where you'll save yourself a ton of time, money, and future headaches by really thinking through what you want and what your home can handle.
Before you buy a single thing, play detective in your own house. Grab your phone, walk from room to room, and run a Wi-Fi speed test. Do you have dead zones in the back bedroom or the basement where you’re hoping to put a smart camera? Finding these weak spots right now tells you if a mesh Wi-Fi system needs to be part of your initial budget, rather than an expensive surprise later.
While you're at it, take a quick look at your existing hardware. Pop open a light switch and see if you have a neutral wire. A lot of smart switches require one, and knowing this upfront saves you the pain of buying something that’s completely incompatible with your home's wiring.
Define Your Primary Mission
Once you've audited your home, it's time to sharpen your focus. A smart home can do almost anything, but you shouldn't try to make it do everything at once, especially at the start. Figure out your main goal to guide your first purchases and keep the project from feeling overwhelming.
What’s the number one thing you want to achieve?
- Ironclad Security: If this is you, you’ll be looking at video doorbells, smart locks, outdoor cameras, and motion sensors. The main goal here is total peace of mind.
- Maximum Convenience: You’re the person who will love smart speakers for voice control, automated lighting for movie nights, and smart plugs to make "dumb" appliances a little bit smarter.
- Serious Energy Savings: Your first move is a smart thermostat. After that, look into smart blinds that close automatically during the hottest part of the day or plugs that kill power to "energy vampire" electronics.
Pick the category that gives you the most immediate, tangible benefit. You can always build out from there. A focused start ensures you actually feel the return on your investment right away, which builds momentum and makes the whole process way more enjoyable.
Understanding the Language of Your Devices
Now for a critical technical choice: the communication protocol. Think of this as the language your devices use to talk to each other and to your central hub. The three big ones you’ll run into are Wi-Fi, Zigbee, and Z-Wave.
Wi-Fi: This is the most familiar option. Devices connect directly to your home router, just like your laptop. It’s simple and doesn’t require any extra hardware. The catch? Piling dozens of smart devices onto your network can clog it up and slow down your Netflix stream.
Zigbee and Z-Wave: These are low-power mesh networks built specifically for home automation. Instead of every device hitting your router directly, they can relay signals to one another. This creates a really robust network that actually gets stronger with each device you add, and it operates separately from your Wi-Fi.
Key Takeaway: Choosing a protocol is more than a tech spec—it dictates your system's reliability and how easily you can expand it later. A multi-protocol hub is often the best bet, giving you the flexibility to mix and match devices without getting locked into a single brand.
To really nail this decision, it helps to understand the pros and cons of each. You can dive much deeper by checking out our complete guide on the different smart home communication protocols and how they stack up. Getting this right is absolutely fundamental to a successful setup.
Alright, you've done the planning, and now for the fun part: actually bringing your smart home to life. This is where the theory ends and the hands-on work begins. We're going to install the core devices that will serve as the foundation for everything else. We'll kick things off with the brains of the operation—the smart hub—and then move on to three of the most popular and impactful first projects you can tackle.
Getting these first few installations under your belt is all about building momentum. Not only will you see immediate benefits, but you'll also gain the confidence to keep expanding your system down the road. Let's get to it.
The simple blueprint we've talked about—auditing your needs, defining your goals, and budgeting—is the key to a smooth installation.
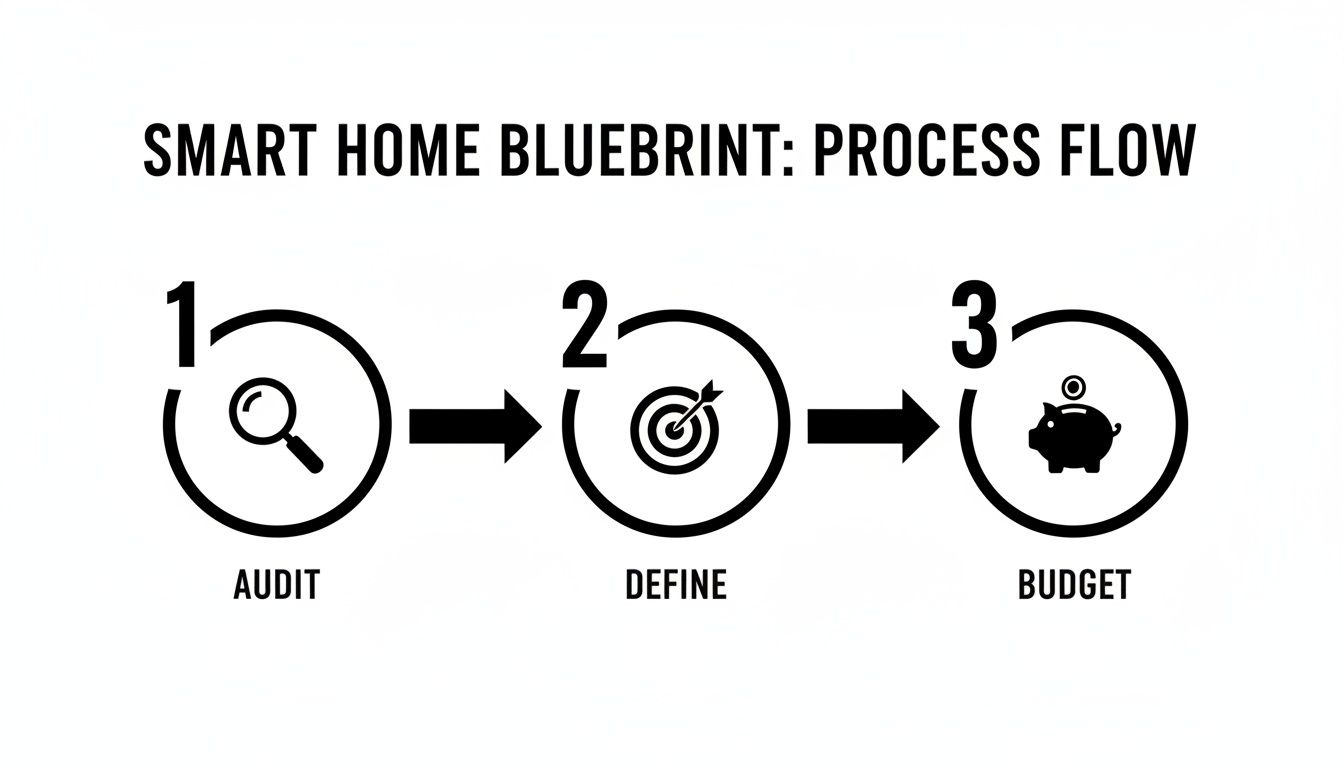
This process just reinforces the old saying: a little planning up front saves a lot of headaches later. Don't unbox a single device until you've got this straight.
Setting Up Your Smart Hub
Think of your smart hub as the air traffic controller for your smart home. It’s the central device that listens for commands and tells all your other gadgets what to do and when to do it. Nailing this setup is the most important first step.
The good news? It’s often the easiest part of the whole installation.
- Find a good spot: Your hub needs a central location, ideally right next to your Wi-Fi router. Don't shove it in a basement corner or a media cabinet—that’s a great way to kill its signal strength and cause connection headaches with your other devices.
- Plug it in: Connect the hub to power and then use the included Ethernet cable to plug it directly into your router. Trust me, a hardwired connection for your system's brain is infinitely more reliable than relying on Wi-Fi.
- Follow the app: Grab your phone, download the manufacturer's app, and it will walk you through the rest. It's usually as simple as creating an account and letting the app find the hub on your network. The whole thing shouldn't take more than 10 minutes.
Once the app gives you the green light, your command center is officially online. Take a few minutes to poke around the app's interface and get a feel for it.
Installing a Smart Light Switch
Swapping out a standard light switch for a smart one is a fantastic entry-level electrical project. It’s a massive convenience upgrade, giving you voice control or scheduled lighting. But let's be crystal clear: safety is everything here.
Heads Up: Safety First!
Before you even think about touching a screwdriver, march over to your circuit breaker and kill the power to the room you're working in. Then, double-check that the power is off with a voltage tester right at the switch. No exceptions.
Once you’re positive the wires are dead, you can get started.
You'll first remove the old faceplate and the screws holding the switch in the wall box. Gently pull it out. You'll likely see a few wires: a black "hot" wire, another black or red "load" wire going to the light, and a bare copper or green "ground" wire. The key thing to look for is a white "neutral" wire, as most smart switches need it to stay powered.
From there, just follow the diagram that came with your new switch. Use the included wire nuts to connect the wall wires to the new switch, and give each connection a little tug to make sure it's solid. Carefully tuck the wires back into the box, screw in the new switch, and pop on the faceplate. Now you can head back to the breaker, flip it on, and test your work—both at the switch and through the app.
Mounting a Video Doorbell
There’s a reason video doorbells are so popular—they offer a huge amount of peace of mind. The installation is pretty straightforward, even if it requires a bit more handiwork.
As always, start by shutting off the power to your existing doorbell at the breaker. Even though it's low-voltage wiring, it's a habit you always want to practice.
Next, unscrew your old doorbell button. You'll see two small wires attached; go ahead and disconnect them. Now you can mount the new doorbell's bracket right over the old spot, feeding those two wires through the opening.
Connect those wires to the two screws on the back of your new video doorbell. It usually doesn't matter which wire goes to which screw, since it's just completing a simple circuit. Clip the doorbell onto its mounting bracket, turn the power back on, and fire up the app to get it connected to your Wi-Fi.
As you start adding more security layers, doing some research by reading a Homeboy security camera review can help you understand the different features available across the market.
Upgrading to a Smart Thermostat
A smart thermostat is one of the best energy-saving devices you can install. Just like with a light switch, this involves messing with your home's wiring, so step one is always the same: turn off all power to your furnace and air conditioner at the circuit breaker.
With the power confirmed off, gently pop the faceplate off your old thermostat. Before you disconnect a single wire, take a picture of the current wiring setup. This photo will be your cheat sheet. Most smart thermostat kits come with little stickers to label each wire (R, G, W, C, etc.), which makes reconnecting them a breeze.
Once the wires are labeled, disconnect them and unscrew the old backplate from the wall. Mount the new one, feed the wires through, and use your photo to connect each wire to its corresponding terminal. Pay special attention to the "C" or "common" wire—it’s what provides constant power to the thermostat's screen and Wi-Fi.
Snap the new thermostat's faceplate on, go restore the power, and watch it boot up. From there, the on-screen display will guide you through the rest of the setup, from connecting to Wi-Fi to telling it what kind of heating and cooling system you have.
Laying a Rock-Solid Network Foundation
Your home network is the central nervous system of your smart home. Every command you issue, every sensor update, and every video stream relies on it completely. If that foundation is shaky, you'll end up with a frustratingly sluggish system, no matter how expensive your gadgets are.
I can't tell you how many times I've seen people blame their new smart lights or cameras for being slow. In reality, lagging responses and endlessly buffering video are almost always symptoms of a weak network, not a faulty device. Getting the network right from the start is non-negotiable for a successful home automation installation.
Fine-Tuning Your Wi-Fi Setup
The physical location of your Wi-Fi router matters more than most people realize. Don't shove it in a basement corner or bury it in a media cabinet. For the strongest, most reliable signal, you need to place it in a central, elevated spot, away from thick concrete walls or big metal appliances that can kill the signal.
Even a top-of-the-line router can struggle to cover a large, multi-story, or oddly shaped house. If you have dead zones where your phone drops the connection, a mesh Wi-Fi system is your best bet. These systems use several small nodes spread throughout your home to create one big, seamless Wi-Fi blanket, ensuring a strong signal everywhere.
Making the right choice here is critical. We've put together a full guide to help you figure out https://automatedhomeguide.com/how-to-choose-a-wifi-router/.
The Smart Move: A Separate IoT Network
Every smart device you add to your home is another potential doorway for hackers. A crucial security step, and one I always recommend, is to create a completely separate network just for your Internet of Things (IoT) devices.
Most modern routers have a "guest network" feature, which is perfect for this. Connect all your smart plugs, lightbulbs, and security cameras to this guest network. This simple action builds a digital wall between them and your main network, where your laptops and phones hold your sensitive personal data. If a vulnerability is ever discovered in one of your smart gadgets, this separation prevents an attacker from getting to your important files.
Pro Tip: When you set up your IoT network, give it a generic name (not "John's IoT Stuff") and protect it with a long, unique, and complex password. This is one of the easiest and most effective security measures you can take.
Looking Beyond Wi-Fi
While Wi-Fi is king for things that need a lot of bandwidth, it's not the only game in town. Many of the most reliable smart home devices, especially sensors and switches, use other wireless protocols like Zigbee and Z-Wave.
These technologies create their own dedicated mesh networks, which offers two massive benefits:
- They don’t jam your Wi-Fi. Since they operate on different frequencies, your 4K movie stream won’t get bogged down by your motion sensors.
- They’re incredibly stable. Every Zigbee or Z-Wave device can act as a signal repeater, which strengthens the network and extends its reach with every device you add.
This is the technology that's driving the industry forward. The global home automation market is on track to hit USD 104.58 billion by 2025, and wireless tech is the choice for over 60% of all installations because it's just easier and cheaper to set up.
When we talk about protocols, it's easy to get lost in the jargon. Here’s a quick breakdown to help you see what might work best for your setup.
Comparing Smart Home Wireless Protocols
| Protocol | Typical Range | Power Consumption | Best For |
|---|---|---|---|
| Wi-Fi | Up to 150 ft (46 m) | High | High-bandwidth devices like security cameras, smart speakers, TVs. |
| Zigbee | Up to 300 ft (90 m) | Very Low | Small sensors, lightbulbs, and switches in dense device environments. |
| Z-Wave | Up to 550 ft (170 m) | Very Low | Locks, garage door openers, and thermostats where range is key. |
| Thread | Up to 100 ft (30 m) | Very Low | Future-proofing; a core part of the new Matter standard. |
Ultimately, choosing the right protocol depends on the device and its job. You’ll get the most dependable and responsive smart home by mixing and matching: use Wi-Fi for your heavy-lifting devices and Zigbee or Z-Wave for all the small, low-power sensors and switches. A deeper understanding network infrastructure will only help you make smarter decisions as you build out your system.
Troubleshooting Common Installation Hiccups
Even when you've planned everything down to the last detail, a home automation project can throw you a curveball. A smart plug might stubbornly refuse to connect, or that brilliant routine you just built simply won’t run. Trust me, it happens to everyone. The trick is knowing how to work through the problem instead of just getting frustrated.
This isn't just you; getting different smart devices to play nicely together has always been a major hurdle. The good news is that the industry is finally getting its act together. With the smart home market projected to balloon by USD 255.2 billion between 2024 and 2029, major tech companies are collaborating to make setups more reliable. You can read more about this trend in this comprehensive market analysis from Technavio.
For now, let’s tackle the issues you’re most likely to face on the ground.
When a Device Refuses to Pair
This is, without a doubt, the most common headache you'll run into. You've followed the instructions perfectly, the app is searching, but your new gadget is nowhere to be found. Don't throw it across the room just yet.
First, try bringing the device physically closer to your smart hub or Wi-Fi router for the initial setup. Signal interference is a real thing—thick walls, large metal appliances, even a running microwave can block the connection. Once you get that successful "paired" notification, you can move it to its final spot.
Still no luck? Time for a factory reset. Look for a tiny, recessed button on the device. You'll likely need a paperclip to press and hold it for about 10 seconds. This forces the device to forget any old settings and gives you a fresh start.
Unresponsive or Lagging Devices
You ask your voice assistant to turn on the lights, and there's that awkward, ten-second pause before anything happens. Or a motion sensor takes ages to trigger the lamp. Nine times out of ten, this is a network problem.
Your first suspect should be network congestion. If you have dozens of devices all trying to talk at once over Wi-Fi, things can get sluggish. A quick fix is to move some of your devices to your router's 5 GHz band, which is usually less crowded than the standard 2.4 GHz band.
For Zigbee and Z-Wave devices, the solution is different. These gadgets create their own "mesh" network. If a device is acting up, it might just be too far from the hub. Try adding another mains-powered device, like a smart plug, somewhere in between. This new device will act as a repeater, strengthening the mesh and making the whole network more robust.
A Quick Tip from Experience: Just reboot everything. I know it sounds cliché, but power-cycling your modem, router, hub, and the problem device solves a shocking number of issues. Start with the modem, wait for it to come online, then move to the router, and so on.
Automation Routines Not Triggering
So you’ve created a "Good Morning" routine to gently raise the lights and start the coffee pot at sunrise, but you're still waking up in the dark. When an automation fails, the problem is almost always in the logic you've set up.
Dive back into that routine's settings in your app and scrutinize every single condition. Did you set it for "sunrise" but accidentally add another condition, like "only if I am home"? One misplaced setting can stop the entire sequence in its tracks.
Another classic mistake is a time sync issue. Make sure your smart hub's location and time zone are set correctly. If your hub thinks it’s three time zones away, its idea of "sunrise" is going to be very different from yours. These little logic puzzles are just part of the game.
Frequently Asked Questions About Home Automation
Even with the best guide in hand, stepping into the world of home automation for the first time is bound to stir up some questions. It’s totally normal. Let’s walk through a few of the most common ones I hear from people just getting started.
How Much Does A DIY Smart Home Installation Really Cost?
This is the big one, and the honest answer is: it’s completely up to you. The beauty of a smart home is that it can scale to fit just about any budget.
You can dip your toes in the water for as little as $100 to $300. That could get you a solid smart hub and a handful of smart plugs or bulbs. It's the perfect way to experiment and see what you like without breaking the bank.
Ready to go all-in with security, lighting, and climate control? You're probably looking at a budget somewhere in the $1,000 to $5,000 range. My advice? Don't try to buy everything at once. Pick one problem to solve—maybe securing your front entry or automating the living room lights—and build out from there. Your system (and your confidence) will grow organically.
Do I Need To Hire An Electrician?
For most of the fun stuff, absolutely not. Smart speakers, plug-in cameras, smart plugs, and most sensors are designed to be simple plug-and-play gadgets. If it doesn't involve touching your home's wiring, you can almost certainly do it yourself.
The line is drawn when you get into hardwired devices. Think smart light switches, in-wall outlets, or some smart thermostats. These require you to get inside the electrical box. If you're not 100% comfortable and knowledgeable about working with your home's wiring, it's time to call a pro. Always, always, always kill the power at the circuit breaker first—no exceptions.
What Are The Biggest Security Risks And How Do I Avoid Them?
The main risk is that a hacker could find a weak link in one of your smart devices and use it to get into your home network. It sounds scary, but the good news is that basic digital hygiene goes a long, long way in protecting your privacy.
Here are the non-negotiables for a secure smart home:
- Lock Down Your Wi-Fi: Your router is the front door to your digital home. Give it a strong, unique password.
- Kill Default Passwords: Every single device you buy comes with a generic, factory-set password. Change it on day one. This is probably the single most important step you can take.
- Use Two-Factor Authentication (2FA): If an app offers 2FA, enable it. That extra code sent to your phone is a massive roadblock for would-be intruders.
- Set Up a Guest Network: This is a pro-level tip that's easy to do. Put all your smart home gadgets on a separate "guest" Wi-Fi network. This isolates them from your main network where your laptop and personal files live.
By isolating your IoT devices, you create a digital buffer. If one device is ever compromised, the attacker can't easily jump over to your personal laptop or phone. It’s a simple move with a big security payoff.
Which Is Better: Zigbee, Z-Wave, or Wi-Fi?
Ah, the classic protocol debate. The truth is, there's no single "best" one—the right choice really depends on what you're trying to do.
-
Wi-Fi devices are everywhere. They're simple to set up because they connect right to the router you already own. The potential downside is that if you add too many—dozens of bulbs, plugs, and switches—you can start to bog down your network, which might slow down your Netflix stream.
-
Zigbee and Z-Wave are different animals altogether. They are low-power mesh networks built from the ground up specifically for smart devices. Each device acts as a repeater, passing the signal along to the next. This means the more devices you add, the stronger and more reliable your network becomes. Zigbee is generally faster, while Z-Wave uses a lower frequency that's less prone to interference from other electronics.
Thankfully, most of the best smart hubs on the market today are multi-protocol. They can speak all these languages, so you don't have to choose a side. You can just pick the best device for the job.
At Automated Home Guide, our mission is to empower you with the practical knowledge to create a smart home that works for you. From deep-dive tutorials to honest reviews, we're here to guide your journey. Find more expert advice at https://automatedhomeguide.com.


Leave a Reply