
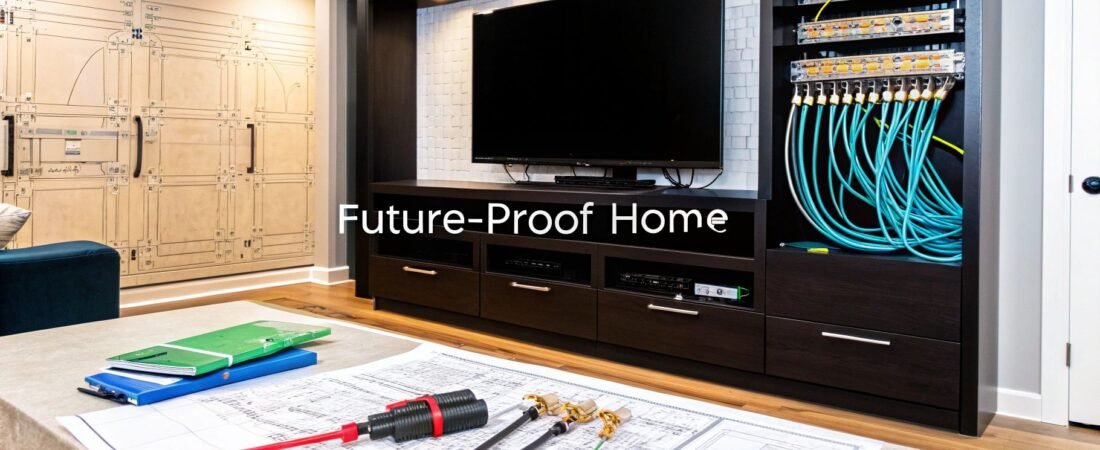
Smart wiring is the secret to a high-performance smart home. It's a centralized network of low-voltage cables—think Ethernet, coaxial, and speaker wires—that run from a central hub to key locations throughout your house. This hardwired system is the permanent fix for unreliable Wi-Fi, guaranteeing top-notch performance for everything from 4K streaming to your home security setup.
Why Smart Wiring Is the Backbone of Your Smart Home
Let’s be real. Relying only on Wi-Fi to run a modern smart home is like trying to build a mansion on a sand foundation. It just won’t hold up.
Wireless is great, but it’s notoriously flaky. It gets bogged down by interference from your neighbor’s network, struggles to get through thick walls, and slows to a crawl when too many devices are fighting for bandwidth. As you keep adding smart TVs, cameras, speakers, and thermostats, your Wi-Fi network gets stretched thinner and thinner, leading to lag, buffering, and dropped connections.
This is where a proper smart wiring plan, often called structured cabling, shifts from a "nice-to-have" to an absolute necessity. It creates a dedicated, high-speed data highway inside your walls, letting your most important devices bypass the Wi-Fi traffic jams completely.
The Real-World Difference
The day-and-night difference between a wired home and a wireless-only one is something you have to experience to believe. With a solid structured cabling system in place, you get:
- Flawless Performance: Your work video calls won't freeze up, and your 4K movie won't start buffering just because the kids fired up the Xbox in the other room.
- Rock-Solid Reliability: Critical systems like security cameras and smart locks have a direct line that won't randomly drop out, giving you true peace of mind.
- Blazing Speed: You actually get the full internet speed you pay for at every wired jack, eliminating the frustrating bottlenecks you get with Wi-Fi extenders and mesh systems.
A lot of people think buying a powerful new Wi-Fi router will solve all their problems. But even the best router can't magically push a signal through concrete or defeat the signal interference from ten other networks nearby. Smart wiring guarantees a perfect connection where you need it, every single time.
Future-Proofing Your Investment
Putting in the right wires today is one of the smartest moves you can make for your home's future. Technology isn't slowing down, and tomorrow's devices will only demand more and more data. A wired backbone ensures your home is ready to handle whatever comes next for decades.
In fact, smart wiring is quickly becoming one of the top must haves in new house construction. It’s a foundational upgrade that not only makes your life easier today but also seriously boosts your home's appeal and resale value down the road.
Planning Your Home's Digital Backbone
Before you even think about pulling a single cable through a wall, the most crucial work happens with a simple pen and paper. Seriously. A well-thought-out plan is what separates a high-performance smart home from a frustrating jumble of useless wires. Think of yourself as the architect of your home's digital nervous system—every single connection needs a purpose.
Grab a floor plan of your house. It doesn't need to be a professional blueprint; a basic sketch of each room's layout will do just fine. The real goal here is to get specific and think critically about how you actually live and work in each space, not just where you think a gadget might go.
This isn't just a trend; it's the new standard for modern homes. The demand for house smart wiring is exploding, with the U.S. market projected to hit USD 55 billion by 2028. This boom is fueled by the nearly 1.25 billion smart devices expected to ship globally by 2026. A lot of those gadgets, especially for security and streaming, work best with a rock-solid wired connection. You can see just how much smart home market trends are shaping modern construction on ConsumerAffairs.com.
A good plan turns spotty Wi-Fi into a flawless, connected experience.
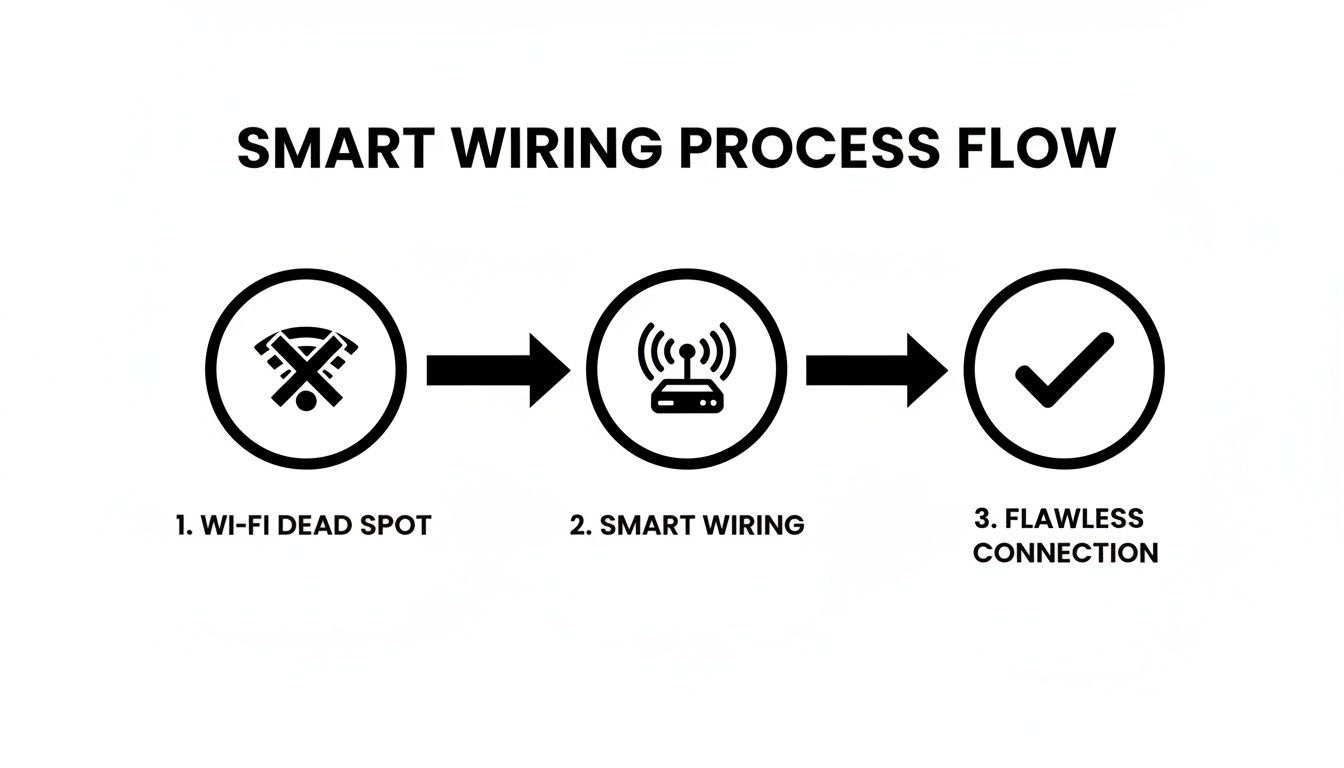
As the diagram shows, structured wiring is the direct solution to common Wi-Fi dead spots, giving you a reliable foundation for your entire smart home.
Pinpointing Your Connection Needs, Room by Room
With your floor plan in hand, start marking it up. Walk through each room in your mind and ask yourself what happens there and what devices you'll need. Don't just think about today—try to imagine your needs five or even ten years from now.
- Home Office: This is non-negotiable for a hardwired connection. I always recommend planning for at least two Ethernet ports right at the desk. One for your main computer and another for a network printer, VoIP phone, or a backup laptop. This guarantees your video calls won't drop and large files transfer quickly.
- Living Room / Media Center: This is your entertainment hub, so don't skimp. You'll want a minimum of four Ethernet ports behind the TV: one for the smart TV itself, one for a streaming box (like an Apple TV or Roku), one for a gaming console, and one spare for the future. While you're at it, mark spots for your surround sound speaker wires and the good old coaxial cable outlet.
- Bedrooms: Even if Wi-Fi seems good enough here, putting in at least one Ethernet port is a smart move. It's perfect for a future smart TV, a gaming setup, or a dedicated streaming device. Trust me, it’s a hundred times easier and cheaper to do it now than to try and fish a wire through a finished wall later.
- Kitchen: The kitchen is becoming a tech hub. Think about adding an Ethernet port for a smart display (like a Google Nest Hub) or a small wall-mounted tablet you can use for recipes and controlling the rest of the house.
And don't forget about devices that aren't just for fun. Mark the best spots on your floor plan for security cameras (both inside and out), your smart doorbell, and, critically, ceiling locations for Wi-Fi access points to blanket your home in perfect coverage.
Choosing Your Central Command Center
All these cables need a place to come home to. This central spot is often called a media closet, network panel, or structured wiring cabinet. It's the brain of your entire setup, housing your router, network switch, and other essential gear.
The ideal spot is usually a utility closet, a corner of the basement, or sometimes even a pantry. The main requirements are that the location is:
- Cool and Dry: Network equipment gets warm, so good ventilation is essential to prevent overheating.
- Accessible: You'll need to get in there to manage connections or troubleshoot, so don't cram it into a tiny, unreachable space.
- Powered: Make sure you have at least one dedicated electrical circuit nearby to power everything without tripping a breaker.
Your central hub is the most critical piece of this entire puzzle. A well-organized panel makes managing your network a breeze. A tangled "spaghetti monster" of wires stuffed into a hot closet is just a recipe for failure and headaches down the road.
To help you keep track of all these details, I've put together a checklist that breaks down the key steps for this crucial planning phase.
Essential Smart Wiring Planning Checklist
This simple checklist will guide you through the process, ensuring you don't miss any critical steps as you design your home's wiring infrastructure.
| Planning Step | Key Consideration | Pro Tip |
|---|---|---|
| 1. Sketch Floor Plan | Create a basic layout of every room, including closets and outdoor areas. | No need for architectural software. A simple hand-drawn sketch with approximate dimensions works perfectly. |
| 2. Identify Device Locations | Mark every spot where you'll need a wired connection (TVs, PCs, cameras, Wi-Fi APs). | Think 5-10 years ahead. Where might you want a connection in the future? Add it now while the walls are open. |
| 3. Choose Central Hub Location | Find a cool, dry, and accessible spot for your network panel (e.g., utility closet, basement). | Check for nearby power outlets. Running a new electrical circuit can add significant cost and complexity. |
| 4. Select Cable Types | Decide on the right cable for each run (Cat6/6A, coax, speaker wire, etc.). | Always opt for the best Ethernet cable you can afford, like Cat6A, to ensure your network is future-proof. |
| 5. Plan Cable Pathways | Determine the most efficient routes from each outlet back to the central hub. | Avoid running low-voltage cables parallel to high-voltage electrical lines to prevent signal interference. |
| 6. Create a Cabling Schedule | Document every cable run in a spreadsheet, including its ID, type, and purpose. | This document is your project bible. It’s invaluable for installation, testing, and future troubleshooting. |
Following these steps methodically turns a complex project into a series of manageable tasks. Once your plan is solid, you're ready for the next phase. If you want more ideas on integrating these systems, you might find our in-depth look at home automation and wiring helpful.
Choosing the Right Cables for Every Connection
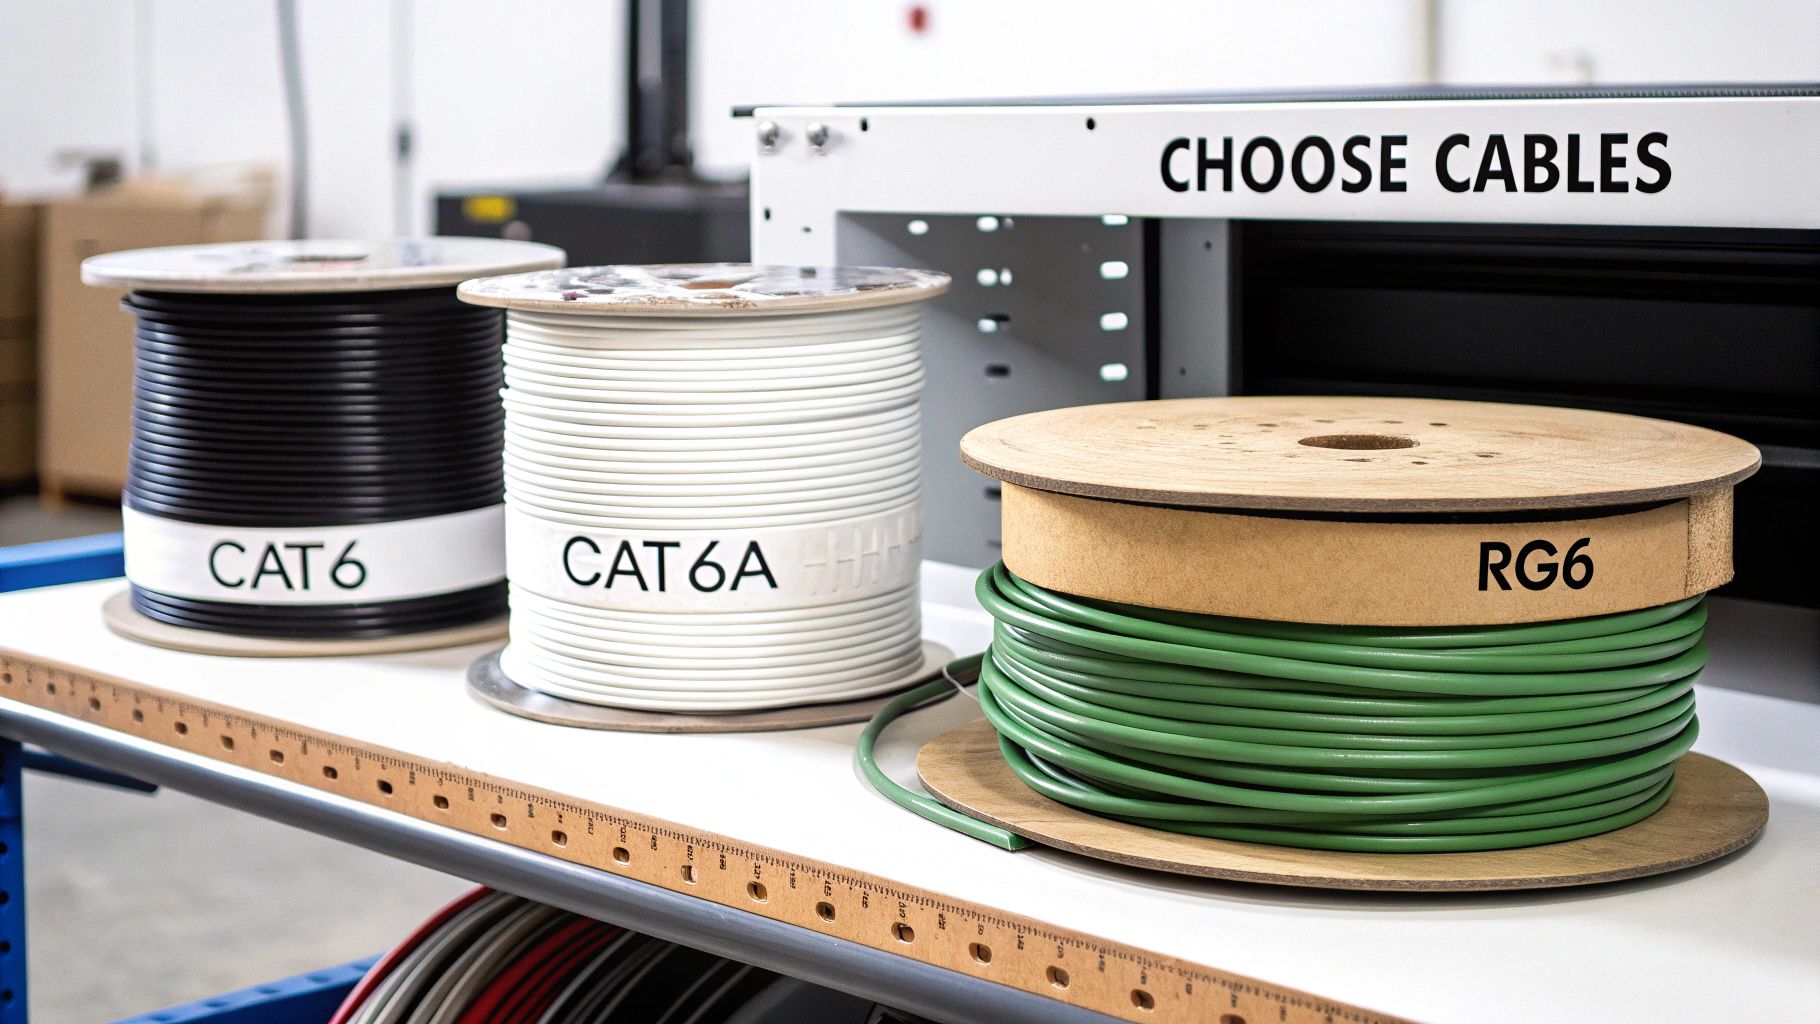
The foundation of any high-performance smart home is, quite literally, the wire inside the walls. I've seen it countless times: homeowners spend a fortune on smart gadgets but skimp on the cabling, only to end up with a system that's slow and unreliable. Getting this part right is absolutely crucial, as the cables you pull today will dictate your home’s digital ceiling for the next decade or more.
Don't let the alphabet soup of specs like Cat6, RG6, and CL2 intimidate you. Choosing the right cable isn't about buying the most expensive spool; it's about matching the wire to the job, whether that's delivering flawless 4K video to a media room or giving your home office a rock-solid gigabit connection.
This isn't just a niche hobby anymore. The market for smart wiring devices was already valued at US$64.7 billion and is expected to hit US$97.9 billion by 2033. That growth is fueled by homeowners like you who want reliable, automated homes.
The Workhorse of Smart Homes: Ethernet Cabling
When it comes to your home network, nothing beats the speed and stability of a hardwired Ethernet connection. Wi-Fi is great for convenience, but for anything that needs serious bandwidth or a bulletproof connection, you run a cable. End of story.
For any new project today, your choice really boils down to two options: Category 6 (Cat6) and Category 6A (Cat6A).
Cat6 Cable: This has been the solid, reliable standard for years. It easily handles speeds up to 1 Gigabit per second (Gbps), which is perfect for most of today's internet plans and streaming needs. It’s also a bit more flexible and less expensive than Cat6A, making it easier to pull through tight spaces.
Cat6A Cable: This is your future-proof option. Cat6A is built for blazing-fast 10 Gbps speeds. While your internet provider probably doesn't offer that yet, 10 Gbps is quickly becoming the standard for internal networks. Think about transferring massive files between computers or streaming uncompressed 8K media from a local server. That's where Cat6A shines.
So, which one do you pick? My personal rule of thumb is to invest in Cat6A for the most important locations. We're talking a few extra cents per foot to buy yourself another decade of network headroom. Run Cat6A to your home office, the main media center, and any planned wireless access point locations. For secondary spots, like a guest room TV, standard Cat6 will do the job just fine.
Pro Tip: The 'Pull-Two' Rule
When running an Ethernet cable to a critical spot like your main TV or office, always pull two cables instead of one. The cost of the extra cable is pocket change compared to the headache and expense of opening up a wall again later. This gives you an instant backup or a port for another device down the road.
Coaxial and Speaker Wire Essentials
While Ethernet is the king of data, you'll still need specialized cables for your audio and video. Using cheap, poorly-shielded wire here is a recipe for disaster—it can seriously degrade your signal and ruin the experience.
For any TV signals coming from a cable provider or an over-the-air antenna, the standard is RG6 coaxial cable. But don't just grab any spool off the shelf. You want quad-shielded RG6. That extra shielding is a lifesaver for blocking electrical interference from other wires in your walls, which is a common cause of pixelation and annoying signal dropouts.
When it comes to in-wall speakers for whole-home audio, the most important factor is the wire's gauge (its thickness). The right gauge depends entirely on how long the run is from your amplifier to the speaker.
- Up to 100 feet: 16-gauge speaker wire works great.
- 100 to 200 feet: You'll want to step up to a thicker 14-gauge wire to avoid signal loss.
- Over 200 feet: For these extra-long runs, go with heavy-duty 12-gauge wire.
Using a wire that's too thin for a long run will result in weak, muddy sound. It’s also critical to use wire that’s safety-rated for in-wall use. Always look for a CL2 or CL3 rating printed on the jacket. This certification means it’s safe to install inside your walls and meets fire safety codes. Understanding how these choices fit into the bigger picture is key, and you can get more context from our guide on the fundamentals of wiring for home automation.
To make this easier, here’s a quick-reference table to help you match the right cable to the right application.
Smart Home Cable Selection Guide
| Cable Type | Primary Use | Recommended Spec | Future-Proofing Tip |
|---|---|---|---|
| Ethernet | Internet, data, smart devices, security cameras | Cat6A (Category 6A) | Always pull two runs to critical locations like offices and media centers. |
| Coaxial | Cable/satellite TV, antenna signals, internet | RG6 Quad-Shield | Run to every potential TV location, even if you plan to stream. |
| Speaker | In-wall/in-ceiling speakers, whole-home audio | 14/2 or 14/4 CL2-Rated | Use 14-gauge as a minimum for quality. The "4" conductor wire can power stereo speakers. |
| Low-Voltage | Doorbells, thermostats, security sensors | 18/2 or 18/4 | Run extra conductors (e.g., 18/4 instead of 18/2) for future smart device upgrades. |
This table simplifies the core decisions, but remember to always double-check the specific requirements for any high-end audio or video gear you plan to install.
Pro Tips for Pulling and Protecting Your Cables
Alright, you've got a solid plan and a pile of cables ready to go. Now comes the part where theory meets reality. Getting wire from Point A to Point B is the heart of house smart wiring, but it's also where a small slip-up can create a huge headache later. A few pro techniques will make all the difference, ensuring your system works perfectly from day one.
The single most important rule is keeping your low-voltage data cables (like Ethernet and coax) away from high-voltage electrical lines. Think of them as rival gangs—they don't play well together. When data and power cables run parallel, the powerful magnetic field from the electrical lines can bleed over, creating "noise" that corrupts your data signal. This means a slower, glitchier network.
Keeping Your Signal Clean
To avoid that signal degradation, you just need to follow a few simple rules of the road. This isn't just a friendly suggestion; it's how every professional structured cabling job is done.
- Give Them Space: Try to keep at least 12 inches of separation between your data cables and any parallel electrical wires. This is your golden rule.
- Cross at 90 Degrees: If you absolutely have to cross a power line, make sure you do it at a perpendicular 90-degree angle. This minimizes the contact point and dramatically cuts down on potential interference.
- Use Different Stud Bays: The best-case scenario? Run your data cables down a completely separate stud bay from any electrical wiring.
Even with the best installation, knowing the basics of electrical wiring repair is a good skill to have for long-term maintenance and troubleshooting.
The Gentle Art of the Cable Pull
Pulling cable seems like a job for brute force, but it's actually a game of finesse. One of the most common and frustrating mistakes is damaging the cable during the pull. You often won't find out until the drywall is up and you're wondering why your internet is so slow.
A major culprit is making bends that are too tight. An Ethernet cable has eight delicate copper wires inside, precisely twisted to cancel out interference. If you kink that cable or yank it hard around a sharp corner, you can ruin that internal geometry forever.
A great rule of thumb is to never bend a data cable tighter than a circle with a diameter four times the cable's own thickness. For a standard Cat6A cable, imagine the curve of a coffee mug—don't bend it any sharper than that.
Another trick that will save you future pain is leaving a "service loop." This is just an extra 2 to 3 feet of coiled cable left in the wall behind each outlet and back at your central panel. It might feel wasteful, but trust me, this slack is a lifesaver. When you need to replace a wall plate or re-terminate a faulty connection, you'll be thankful you have the extra wire to work with. Our guide on smart home electrical installation gets into more of these practical details.
If You Don’t Label, You’ll Regret It
If you only listen to one piece of advice in this whole guide, let it be this: label every single cable at both ends. This is what separates a clean, professional job from an amateur nightmare. It feels tedious in the moment, but it will save you from a world of pain later.
Picture this: you're at your brand-new network rack, staring at a bundle of 20 identical blue cables. Which one goes to the living room? The office? The security camera? Without labels, you’re stuck playing a guessing game with a cable tester for hours.
Here’s how to do it right:
- Come Up With a System: Use a simple, logical code. Something like "LR-TV1" for the living room TV, "OFF-PC" for the office computer, or "DRV-CAM" for the driveway camera.
- Use Good Labels: Masking tape will just dry up and fall off inside a wall. Get a real label maker with wrap-around labels or buy a sheet of pre-printed cable flags.
- Label Both Ends Immediately: As you pull each wire, label the end you're holding and the end still on the spool before you cut it. This is non-negotiable.
This simple act of discipline transforms your final setup from a maddening puzzle into a simple, satisfying plug-and-play experience.
Terminating Wires and Bringing Your Network Online
After all the planning and pulling, you’re left with bundles of raw cable ends poking out of walls and converging in your central hub. This is the moment of truth, where that tangled mess transforms into your home’s high-speed nervous system.
Properly terminating these wires is a detailed process, but it's what unlocks the true performance of your house smart wiring investment. It's less about brute force and more about precision. From punching down tiny Ethernet conductors to attaching clean connectors for your speakers, getting the terminations right ensures every connection is perfect, stable, and ready to deliver.
This is where your meticulous labeling pays off big time.
Mastering the Art of Termination
For your Ethernet cables, the best practice is to use keystone jacks at the wall plates and a patch panel in your central closet. I can't recommend this approach enough—it’s clean, professional, and makes future changes incredibly simple. To do this right, you’ll need a few essential tools.
First, a good punch-down tool with a 110-style blade is non-negotiable. This tool doesn't just push the wire into the jack; it precisely seats the conductor and trims the excess in one clean motion. You'll also need a quality wire stripper designed for data cables to avoid nicking the delicate inner wires.
Here’s the process I follow for a perfect termination every time:
- Prepare the Cable: Carefully strip about an inch of the outer jacket. Go easy here—you don't want to cut the twisted pairs inside.
- Untwist and Align: Fan out the four pairs of wires. For each individual wire, untwist it as little as possible—just enough to seat it in the jack. The twists are critical for signal integrity.
- Follow the Color Code: Every keystone jack and patch panel will have two color code diagrams printed on it: T568A and T568B. Just pick one (T568B is the most common standard) and stick with it for every single termination in your house. Consistency is key.
- Punch It Down: Place each wire into its corresponding color-coded slot. Then, use your punch-down tool to firmly press each wire into place. You should hear a satisfying "click" as the conductor makes contact and the excess wire is trimmed.
It's easy to get lazy with terminations, but a single poorly-seated wire can degrade a 10Gbps connection to dial-up speeds or cause it to fail entirely. Take your time, double-check your color codes, and ensure every connection is solid.
Test Everything Before You Patch
Before you even think about putting on wall plates or connecting your expensive equipment, you must test every single cable run. Trust me, this step is not optional. A simple network cable tester is an inexpensive tool that will save you from immense frustration down the road.
These testers have two parts: a main unit and a remote. Plug one into your patch panel and take the other to the corresponding wall outlet. It will send a signal down each of the eight wires and confirm continuity, letting you know instantly if you've made a mistake. Fixing a bad connection now takes two minutes; finding and fixing it after the furniture is in place is a nightmare.
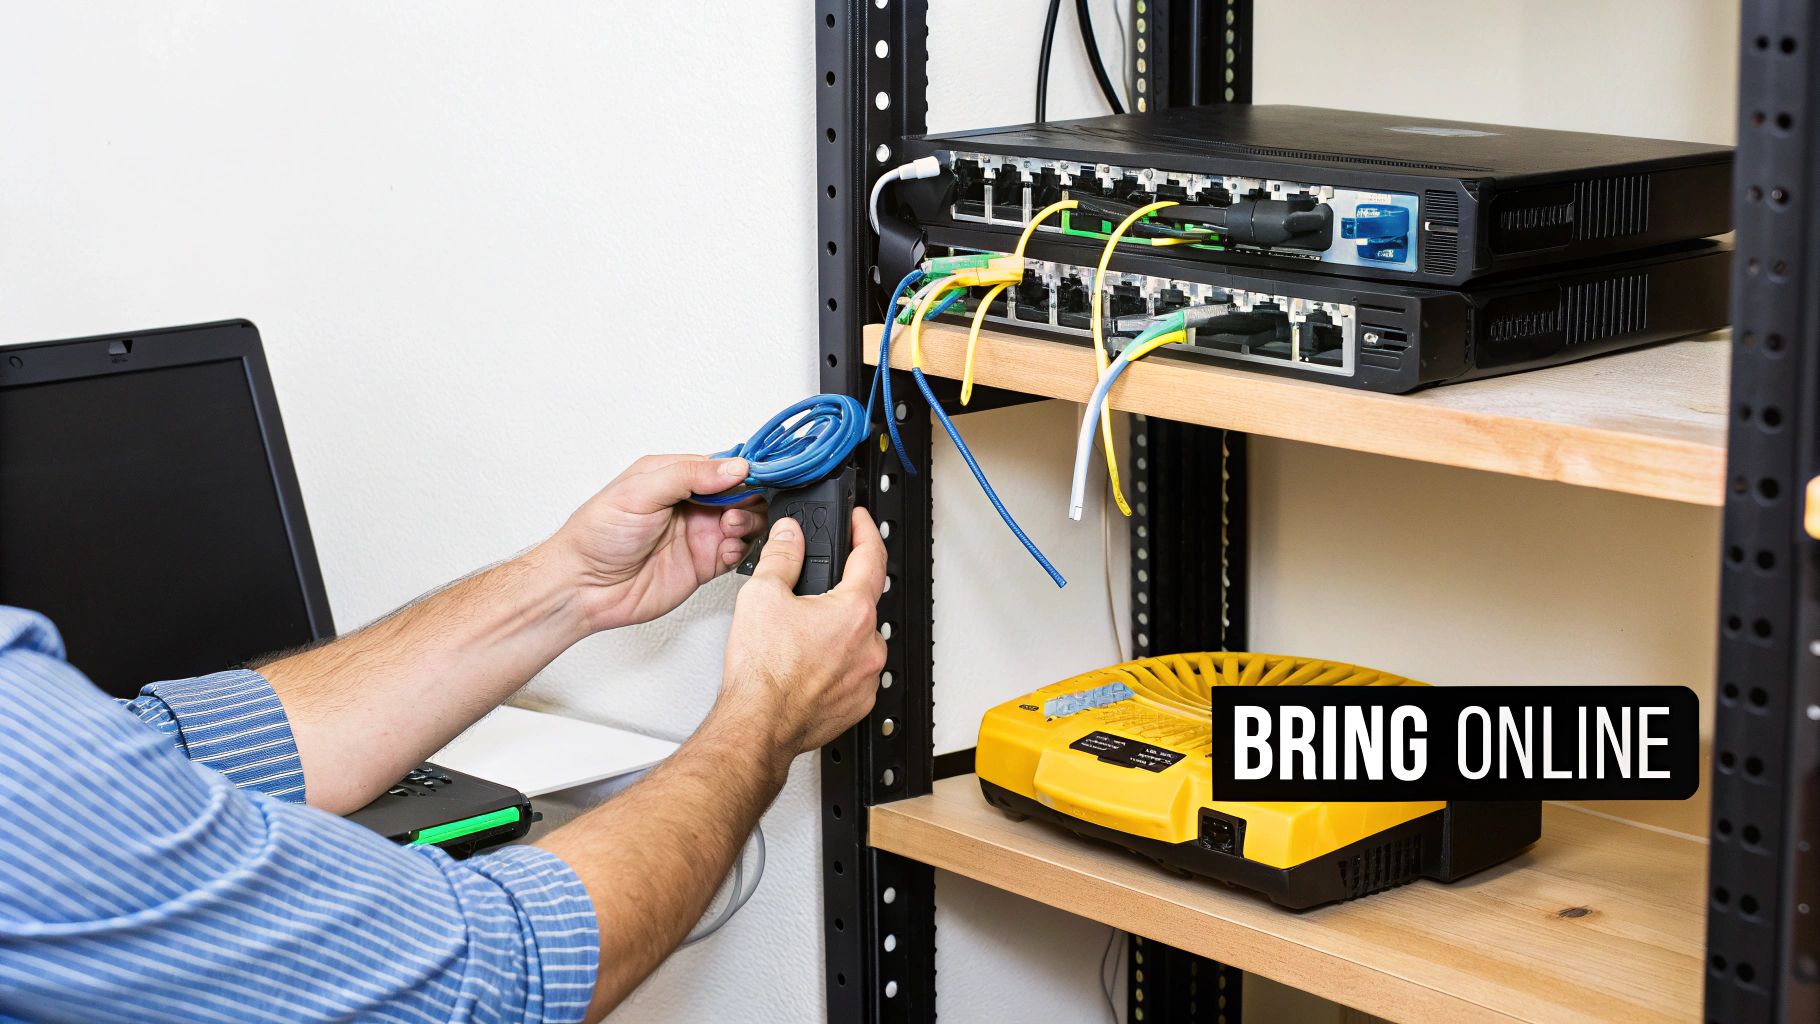
Powering Up Your Central Hub
With every cable run terminated and tested, it's time for the most rewarding part: bringing your network to life. At your central hub, you'll install your core equipment, which typically includes a modem, a router, and a network switch.
Use short, pre-made patch cables to connect each port on your patch panel to a corresponding port on your network switch. For example, the cable labeled "LR-TV" on your patch panel gets connected to any open port on the switch. The switch, in turn, connects to one of the LAN ports on your router.
This structured setup is the foundation that enables the massive growth in smart home technology. The global market, valued at USD 147.52 billion, is projected to soar to USD 848.47 billion by 2034, driven by over 1.1 billion smart devices that rely on stable connections like the ones you've just built. As tech-savvy homes multiply, a wired backbone is essential. If you're interested, you can discover more insights about the smart home market surge on fortunebusinessinsights.com.
Once everything is patched in and powered on, you can start connecting your devices at the wall plates. Plug in your computer, your smart TV, and your wireless access points. You've officially built a robust, high-speed digital foundation for your home.
Got Questions About Smart Wiring? We've Got Answers.
Even the best-laid plans can hit a few snags, and wiring an entire house is no small feat. It’s natural to have questions pop up as you get into the nitty-gritty. Let’s walk through some of the most common things people ask when they're staring down a smart wiring project, from the budget to whether it's all worth it.
How Much Is This Actually Going to Cost Me?
This is always the first question, and the honest-to-goodness answer is: it really depends. If you're building a new home and the walls are still open, you're in the best-case scenario. The cost is mostly for the bulk cable and the labor to run it, which for an average 2,500-square-foot house, might land somewhere between $2,000 and $5,000.
Retrofitting an existing home is a whole different ballgame. The real work—and cost—comes from carefully fishing wires through finished walls, navigating floor joists, and patching things up afterward. For that same-sized house, you could easily be looking at $5,000 to $15,000 or even more. The final price tag hinges on your home's construction and how many outlets you're planning.
Here's a pro tip on budgeting: The cable itself is cheap. Labor is what costs you. That’s why you should always, always run more cables than you think you need to key spots. The cost of adding a second or third cable while the wall is already open is tiny compared to doing it all over again in five years.
Can't I Just Wait for Wi-Fi 7?
It's a fair question. Every time a new, faster Wi-Fi standard comes out, people wonder if running cables is obsolete. While Wi-Fi 7 is impressive, it will never beat a dedicated, physical wire for pure, unshakable performance.
Here’s how I think about it:
- Rock-Solid Reliability: A hardwired connection doesn't care about your neighbor's new router, the microwave running, or that thick brick wall. For things that absolutely must stay online—like security cameras or your work-from-home PC—nothing beats a cable.
- Uncongested Speed: A Cat6A cable gives a single device its own private, 10 Gbps highway. Wi-Fi, no matter how fast, is a shared party line. All your devices are shouting over each other to be heard, splitting the available bandwidth.
- Tighter Security: It's just plain harder to hack a physical connection. A wired network is fundamentally more secure than one broadcasting your data through the air.
The smart play isn't choosing one over the other. You build a strong wired backbone for your critical devices, which frees up your Wi-Fi to do what it does best: provide amazing, convenient wireless access for your phones, tablets, and laptops.
Is This Complete Overkill for My House?
It's easy to look at a spool of Cat6A and wonder if you're going overboard. But in my experience, homeowners are far more likely to under-plan and wish they'd done more. What feels like overkill today has a funny way of becoming the bare minimum in just a few years.
Think about what's coming down the pipeline: 8K video streaming, cloud gaming that feels instantaneous, augmented reality applications, and dozens of smart devices all chattering on your network. A solid wired foundation is the only way to make sure your home is ready for all that without needing another massive renovation. This isn't just for bleeding-edge techies; it's about making sure your home's infrastructure can support modern life for the next 15-20 years.
Ready to create a home that's as smart as you are? At Automated Home Guide, we provide the expert insights and practical guides you need to make your smart home vision a reality. Explore our resources today and start building a safer, more efficient home.


Leave a Reply