
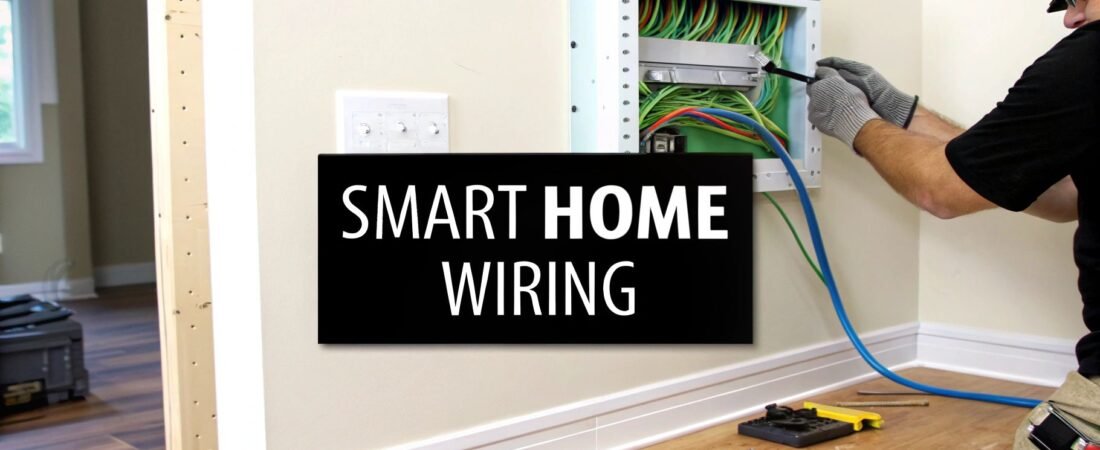
When we talk about "smart wiring" a home, we're really talking about laying down a high-performance central nervous system for all your technology. This means installing a centralized, structured cabling system designed for low-voltage gear—think internet, video, audio, and security.
It's the secret to creating a rock-solid, high-speed foundation that makes relying on Wi-Fi alone look ancient.
Why Smart Wiring Is the Backbone of Your Smart Home
First, let's get one thing straight: smart wiring isn't some impossibly complex, futuristic tech. It’s simply the hidden infrastructure that makes sure your 4K TV streams without buffering, your security cameras never drop their feed, and your smart thermostat responds instantly. It eliminates the lag and connection drops that drive everyone crazy.
Wi-Fi is fantastic for convenience, no doubt. But the more devices you pile onto a purely wireless network, the more it starts to groan under the pressure. Every smart speaker, laptop, gaming console, and phone is fighting for a slice of the same wireless bandwidth, which inevitably leads to congestion and slowdowns.
The Limits of a Wireless-Only Home
Picture a typical evening at home. Someone's streaming a movie in 4K in the living room, another person is on an important work video call in the office, and a teenager is deep into an online gaming battle. On a wireless-only network, this is a recipe for disaster. You get buffering video, choppy calls, and game-ending lag.
This is exactly where smart wiring shows its worth. By hardwiring your stationary, high-bandwidth devices (like your TV, desktop computer, or media server), you clear the Wi-Fi airwaves for the gadgets that are actually mobile, like your phone and tablet. It’s like turning a single, congested country road into a multi-lane superhighway for your data.
Key Takeaway: Smart wiring doesn't replace Wi-Fi—it makes it better. By offloading the heavy data lifting to a dedicated wired network, you guarantee top speed and unbreakable reliability for every single device in your home.
When you start looking at the differences side-by-side, it becomes clear why a wired backbone is so crucial for a serious smart home setup.
Wired vs Wireless Smart Home Reliability
| Feature | Wired Backbone (Smart Wiring) | Purely Wireless (Wi-Fi) |
|---|---|---|
| Speed & Bandwidth | Consistently high-speed (1-10 Gbps+); dedicated bandwidth per device. | Variable speeds; shared bandwidth leads to congestion and slowdowns. |
| Reliability | Extremely stable connection, immune to most interference. | Susceptible to interference from appliances, walls, and neighbor networks. |
| Latency (Ping) | Ultra-low latency, critical for gaming and real-time communication. | Higher latency, which can cause lag in time-sensitive applications. |
| Security | More secure; requires physical access to the network ports. | Vulnerable to wireless hacking and unauthorized access if not properly secured. |
| Scalability | Easily supports a massive number of devices without performance degradation. | Performance degrades as more devices are added to the network. |
Ultimately, a wired backbone ensures that your network's performance doesn't become a bottleneck as your smart home grows.
A Foundation Built for the Future
The move toward structured wiring isn't just a niche trend; it's grown right alongside the explosion in home automation. By 2023, global IoT connections hit a staggering 16.6 billion. While only a fraction of those are wired, they represent the essential backbone that supports billions of end-point devices like security cameras and sensors. This wired foundation is what delivers the low-latency, secure data transfer a true smart home needs.
You can get a deeper look into these trends and the state of connected IoT devices on iot-analytics.com.
Putting in this work now provides immediate, noticeable benefits, and it also future-proofs your home for whatever tech comes next. The many benefits of home automation are truly unlocked when they're running on a network you can count on.
While smart wiring provides the physical highway, understanding how to set up a smart home helps you connect all the pieces. A solid wired network makes sure every new gadget you bring home performs at its peak, boosting your home’s functionality and long-term value. It’s not just another upgrade; it's a foundational investment in a seamless, frustration-free connected life.
Designing Your Smart Wiring Blueprint
Before you pull a single cable, the real work begins on paper. This is where you lay the foundation for a smart home that’s reliable and ready for whatever comes next. Think of it as creating the architectural plans for your home's digital nervous system.
Jumping in without a clear plan is a surefire way to end up with a tangled mess, wasted money, and frustrating dead spots. A little forethought now will separate a truly professional-grade setup from an amateur one. You need to be intentional, thinking through how you use each room today and how you might use it five or ten years from now.
The diagram below really hits home why this matters. It shows the journey from the usual wireless headaches—like signal drops and congestion—to the rock-solid stability a wired backbone provides.
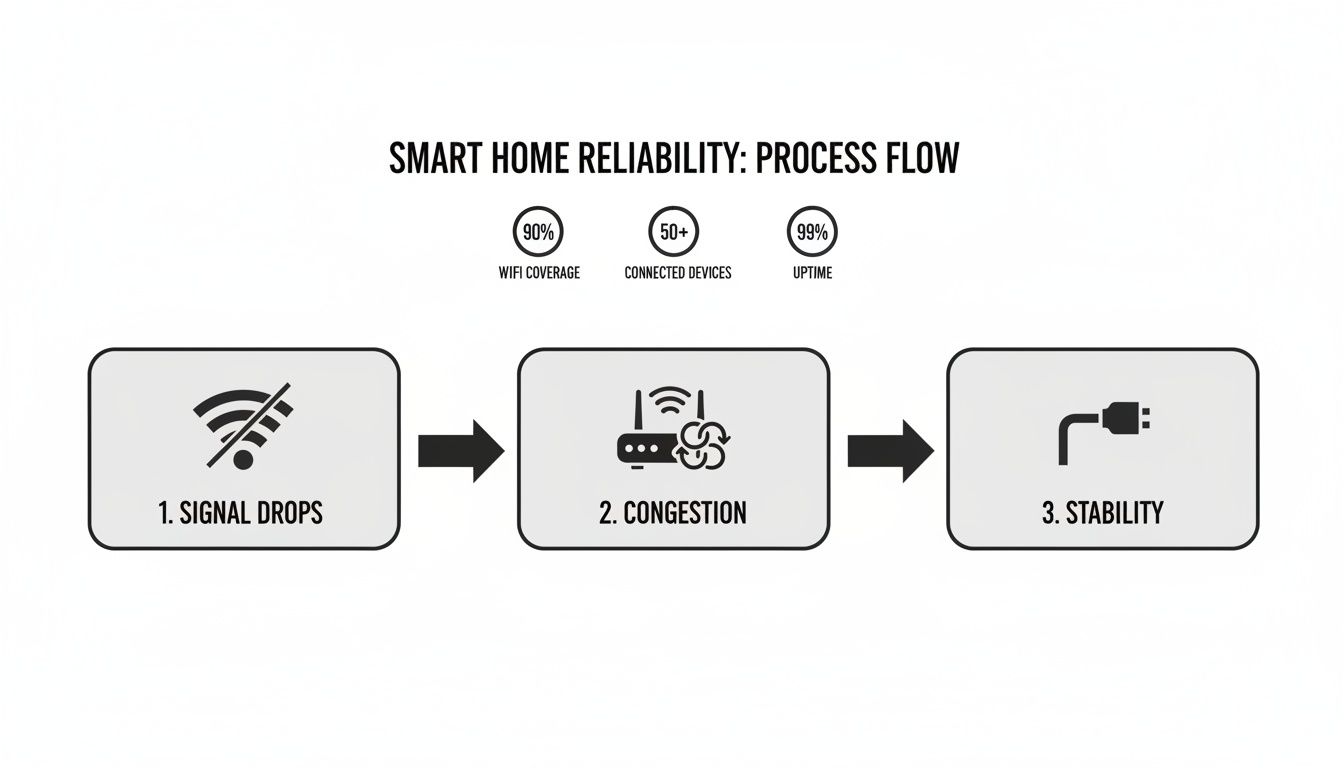
As you can see, shifting from an overburdened Wi-Fi network to a dedicated wired infrastructure is the only way to get the kind of performance a modern smart home actually needs.
Mapping Out Your Home's Needs
Grab a floor plan of your house—even a rough hand-drawn sketch will do the trick. Now, walk through it room by room and mark every single spot where a device could use a stable, fast, wired connection. We're not just talking about computers. Think about any stationary gadget that you don't want dropping its connection.
Here are a few common examples to get you started:
- Living Room: This is your media command center. You’ll want ports behind the TV for the television itself, a streaming box (like an Apple TV), a soundbar, and any gaming consoles. Plan for at least four here.
- Home Office: A hardwired connection is non-negotiable for anyone working from home. Lag-free video calls and quick cloud access depend on it. I always recommend at least two ports—one for your computer and another for a network printer or NAS.
- Bedrooms: Even if you mostly use laptops or tablets here, adding a wired port is a savvy move. It’s perfect for a smart TV, another gaming console, or a desktop computer down the line.
- Ceilings & Hallways: Don't forget to look up! Mark the best central locations for ceiling-mounted Wireless Access Points (WAPs). A hardwired WAP delivers exponentially better speed and coverage than any standalone mesh router can.
This simple audit gives you a concrete wiring map and ensures no critical spots get missed.
Selecting Your Command Center
All those cables need a place to come home to. This central hub is called a structured wiring panel (or media enclosure). It's basically a metal cabinet, usually installed right between the studs, that neatly houses your modem, router, network switch, and the patch panel where all your cable runs terminate.
Where you put this panel matters. A lot. You’re looking for a cool, dry, out-of-the-way spot like a utility closet, basement, or garage. Good ventilation is a must to keep your gear from overheating, and you'll obviously need access to power. Make it easy to get to—you'll thank yourself later when you need to upgrade or troubleshoot something.
Pro Tip: I always recommend running a dedicated electrical circuit to the wiring panel. This isolates your sensitive network equipment from electrical "noise" or power dips caused by heavy appliances like a vacuum or microwave kicking on.
Planning for the Unforeseen
One of the biggest mistakes people make is only wiring for the tech they have today. The smartest thing you can do—especially if the walls are open—is prepare for the technology of tomorrow. The easiest way to do this is by installing flexible, non-metallic conduit, often called "smurf tube" for its typical bright blue color.
Run an empty conduit from your central panel to key locations like the main entertainment center and the home office. This gives you a protected, hollow pathway inside the wall. Ten years from now, when some new fiber optic standard is the norm, you can pull the new cable through in an afternoon without touching a single piece of drywall.
Another simple trick that pays huge dividends is color-coding your cables. Use one color for data (Cat6), another for video (coaxial), and maybe a third for security wiring. Speaking of which, a wired setup is a massive upgrade for home security; you can see a full breakdown by comparing the reliability of wireless vs wired security systems in our other guide. This little bit of organization makes managing and troubleshooting your connections a breeze.
Choosing the Right Wires and Components
Now that you've got a solid plan, it's time to get your hands on the actual hardware. Selecting the right cables and components isn't about buying the most expensive gear on the shelf. It’s about picking the right tools for the job—parts that will perform reliably for the next decade and beyond. The quality of this physical backbone will dictate the speed, stability, and longevity of your entire smart home.
Think of these cables as the arteries of your home's nervous system. A bad cable creates a bottleneck, choking off data flow and causing endless frustration. This is one area where spending a little extra on quality materials pays for itself almost immediately.
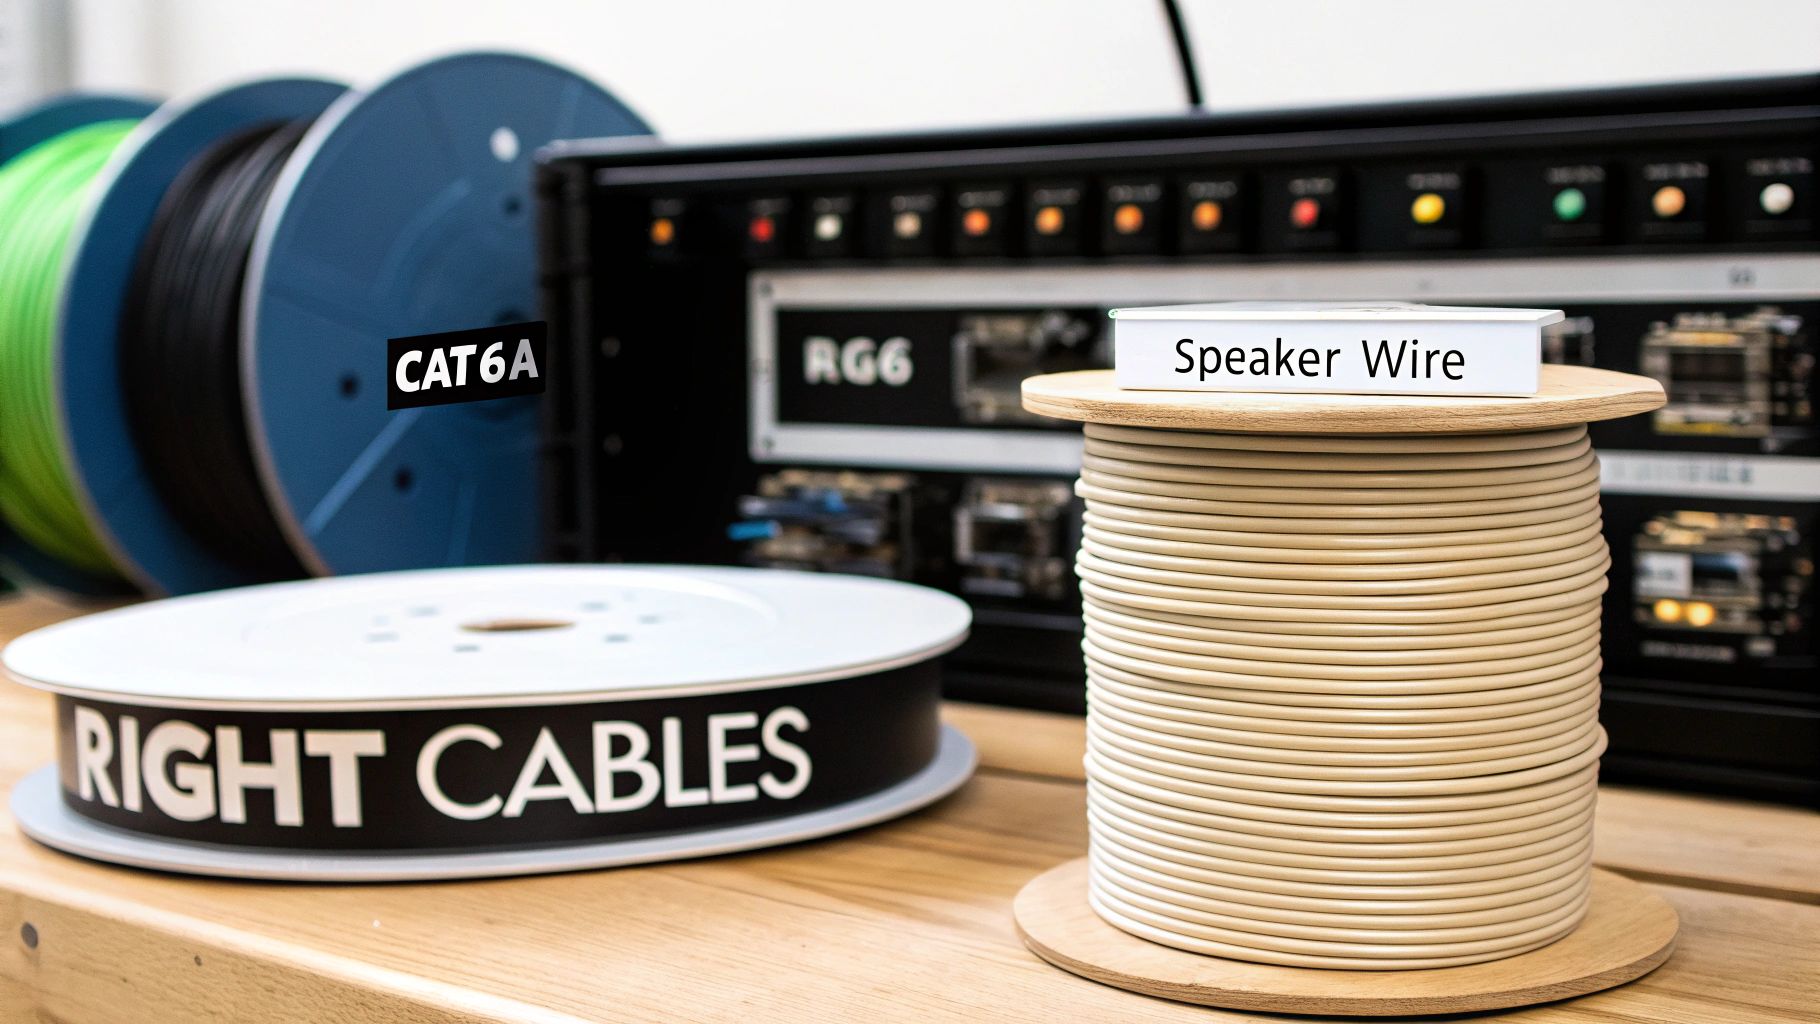
Data: Why Cat6a Is the Only Real Choice
For every network drop in your home—your office, your media center, your security cameras—you should be running Category 6a (Cat6a) cable. Period. You might see Cat6 out there, and while it works, the "a" for "augmented" makes a huge difference.
Cat6a is built to handle speeds up to 10 Gigabits per second (Gbps). That’s ten times faster than standard Cat6. It might feel like overkill today, but trust me, it’s the definition of future-proofing. As 8K streaming becomes standard and file sizes continue to explode, you'll be glad you have the extra headroom.
On top of raw speed, Cat6a provides much better shielding against "crosstalk"—the signal interference that happens when you bundle a bunch of cables together. It's also the clear winner for Power over Ethernet (PoE) devices. This is the tech that lets a single network cable carry both data and power to devices like security cameras, Wi-Fi access points, or even smart lighting, which drastically simplifies installation. You can learn more about how this integrates with your home's main power in our smart home electrical installation guide.
Audio, Video, and Other Essentials
A truly smart home isn’t just about data. You'll need a couple of other key cable types to handle everything else.
- RG6 Quad Shield Coaxial: This is your workhorse for any video signals, like from a satellite dish or a terrestrial antenna. The "Quad Shield" part is crucial; it has four layers of shielding to fight interference, which means a crystal-clear picture without annoying pixelation or signal drops.
- 14- or 16-Gauge Speaker Wire: If you're planning for in-wall or in-ceiling speakers (and you should be!), you'll need to run dedicated speaker wire. For most runs, 14-gauge is a solid, all-around choice. If you have a particularly short run from the wall plate to the speaker, 16-gauge will do the job just fine.
Pro Tip: Always, always buy your cable on bulk spools, typically 500 or 1000 feet. It’s dramatically cheaper than buying it by the foot, and having extra on hand for future projects or a quick repair is a lifesaver.
Selecting the right cable for each job ensures you have the bandwidth and signal integrity exactly where you need it. Here’s a quick-glance table to help you keep things straight.
Smart Home Cable Selection Guide
| Cable Type | Recommended Specification | Primary Use Case | Pro Tip |
|---|---|---|---|
| Ethernet | Cat6a U/FTP (Shielded) | High-speed data for computers, TVs, Wi-Fi Access Points, PoE devices | Look for solid copper conductors, not copper-clad aluminum (CCA), for better performance and PoE safety. |
| Coaxial | RG6 Quad Shield | Cable/Satellite TV, Over-the-air antenna, Modem connection | The quad shielding is non-negotiable for preventing signal interference from nearby power lines. |
| Speaker Wire | 14/2 or 14/4 OFC | In-wall/in-ceiling speakers, whole-home audio systems | Use 14/4 (4-conductor) wire to power a pair of stereo speakers with a single cable run. Saves time and conduit space. |
| Low-Voltage | 18/2 or 16/2 | Smart thermostats, security sensors, doorbell power, LED lighting | Check the power requirements of your specific device. Some newer video doorbells require 16-gauge wire. |
This reference should give you a great starting point for building your shopping list and ensuring you don't find yourself with the wrong spool of wire mid-project.
Finishing Touches: Wall Plates and Keystone Jacks
The cables in the wall are useless without a clean way to access them. That's where wall plates and keystone jacks come in.
Keystone jacks are the small, modular connectors that snap into a wall plate. You can get them for everything: Cat6a, coax, speaker wire banana plugs, you name it. This modular system lets you build custom faceplates for each location. Your TV wall plate, for instance, might have four Ethernet jacks and a coax jack, while a simple bedroom plate might just have two Ethernet ports.
These components provide a professional and durable connection point. It's also critical to ensure all your electrical components are installed safely; a basic familiarity with understanding overcurrent protection devices is a smart move to prevent problems.
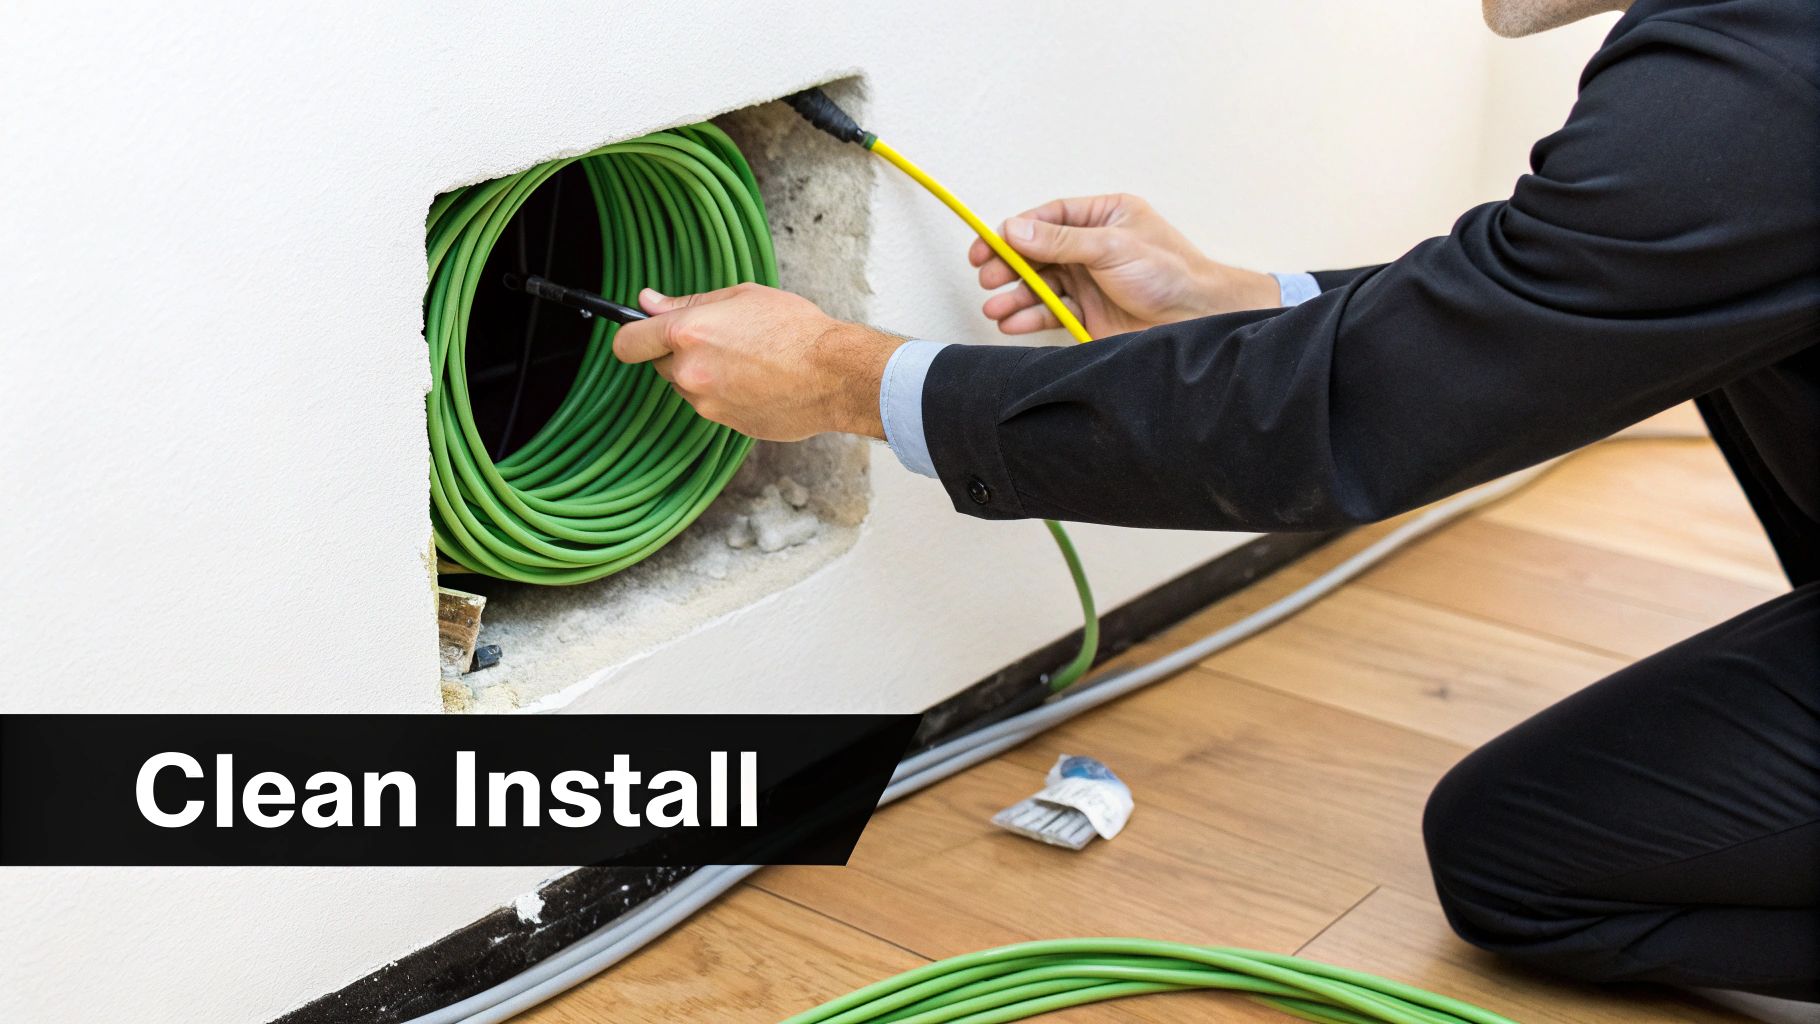
One final pro tip that will save you from a massive headache later: leave service loops. At every single wall plate and back at your central panel, leave an extra 18 to 24 inches of coiled-up slack inside the wall. If a connector ever fails or you need to re-terminate the end for any reason, that extra length is your get-out-of-jail-free card. Without it, you’re stuck with a cable that’s an inch too short.
Pro Tips for a Clean Installation
Alright, you've got your plan and a pile of materials. Now for the fun part—making it all happen. The success of this whole project really boils down to how well you install the wiring. A little bit of care here goes a long way, ensuring your network is fast, reliable, and professional-looking for years to come.
This is more than just yanking cables through walls. A sloppy job can create signal noise, become a potential fire hazard, or make future upgrades a total headache. Let's dig into the best practices that separate a weekend hack job from a truly professional-grade setup.
Maintain Safe Separation
If you remember only one thing, make it this: keep your low-voltage smart cables away from high-voltage electrical lines. When data cables run alongside standard 120V or 240V wiring, you get something called electromagnetic interference (EMI), which is poison for your data signal. It’s the culprit behind slow Wi-Fi, glitchy video streams, and connections that just drop for no reason.
The industry rule is simple but absolutely non-negotiable. You must maintain a minimum gap of 12 inches between low-voltage and high-voltage wires when they run parallel. If you have no choice but to cross them, always do it at a sharp 90-degree angle. This simple trick minimizes the potential for interference.
Master the Art of the Cable Pull
Pulling hundreds of feet of cable through walls without damaging it is a skill. It's surprisingly easy to kink an Ethernet cable, and once you do, the delicate twisted pairs inside can be permanently damaged, killing its performance.
- Avoid Sharp Bends: Never bend a Cat6a cable tighter than a one-inch radius—that’s roughly the diameter of a quarter. Think gentle, sweeping curves, not sharp right angles.
- Use the Right Tools: A good fish tape is your best friend here. It helps you navigate through wall cavities and conduit with ease. Hook the wire on securely and pull with a steady, even pressure. It helps to have a partner feeding the cable off the spool to prevent it from snagging.
- Pull, Don't Push: Trying to shove a cable through a wall is a recipe for disaster. You’ll just end up with kinks and jams. Always pull the wire from its destination.
My Personal Mantra: Label everything, twice. Before you tuck a single cable into a wall, grab a fine-tip permanent marker or a label maker. Mark both ends with its exact location and what it’s for (e.g., "LIVING ROOM TV 1," "OFFICE PORT 2"). Trust me, this small step will save you hours of maddening guesswork down the line.
Document Everything Before the Drywall Goes Up
Once the walls are closed, all your beautiful wiring work disappears. This is why taking photos is one of the most valuable things you can do. Before any insulation or drywall is installed, go room by room and take detailed pictures and videos of every wall cavity where you've run cables.
Get wide shots of the room to orient yourself, then zoom in on where the wires enter and exit the studs. This documentation is absolute gold if you ever need to troubleshoot a problem or if a future contractor needs to know what’s behind the drywall before they start drilling. It’s like having X-ray vision for your own home.
Perfecting Your Terminations
The final physical step is terminating each cable run into a keystone jack. This is where the rubber meets the road. A poor termination can easily turn your high-performance Cat6a cable into a connection that’s slow and unreliable.
Take your time with this. You'll need a quality punch-down tool to properly seat each of the eight tiny wires into its color-coded slot on the jack. For home networks, you'll almost always follow the T568B wiring standard. Once it's punched down, use a simple network cable tester to confirm every pin has a solid connection. This quick check verifies that your smart wiring is ready to bring your home to life.
Bringing Your Smart Network to Life
With the last cable pulled and every wall plate neatly installed, your home's high-performance nervous system is officially in place. Now it’s time to flip the switch and bring it all to life. This is the moment where all that planning and hard work pays off, transforming a web of wires into a seamless, high-speed ecosystem.
Before you get carried away plugging in all your cool new gadgets, there's one critical, non-negotiable task: testing every single run. You’ll need a simple network cable tester for this—it’s an inexpensive tool that's worth its weight in gold. One by one, plug the main tester into your patch panel and the remote end into each wall jack. A passing test with green lights across the board means your terminations are solid. It's a five-minute check that can save you hours of troubleshooting later.
Activating the Central Hub
Once you've confirmed every cable run is perfect, the real fun begins at your structured wiring panel. This is where your smart home's brain connects to its body. Firing everything up in the right order is key to avoiding connection headaches.
Here’s the right sequence for bringing your command center online:
- Light up the Modem: First things first, connect your Internet Service Provider's (ISP) line—whether it's coax or fiber—to your modem. Power it up and give it a few minutes. Wait for the status lights to go solid, confirming you have a solid connection to the outside world.
- Connect the Router and Switch: Grab an Ethernet cable and run it from the modem's LAN port to the WAN (or Internet) port on your router. Next, connect one of your router's LAN ports to an uplink port on your network switch. The switch is the heavy lifter that will distribute that connection throughout the house.
- Patch in Your Rooms: Now, using short Ethernet patch cables, connect each port on your patch panel to an open port on the network switch. With each click, you’re lighting up a room, making its wall jack officially active and ready for data.
My Two Cents: Think of it this way: the modem brings the internet in, the router manages and secures your local network traffic, and the switch acts as a traffic cop, directing data at full speed to every connected room. This setup is the foundation of a rock-solid network.
Connecting Your High-Demand Devices
Now you get to see the real payoff of smart wiring a home. Start by hardwiring your most bandwidth-hungry devices. Go plug your living room smart TV, your 4K Apple TV, and your PlayStation or Xbox directly into their wall ports.
In your office, do the same for your desktop computer. If you have a Network Video Recorder (NVR) for security cameras, get that hardwired, too. The difference is immediate and dramatic. Video streams start instantly, online games are completely lag-free, and big file transfers happen in a flash. This hardwired backbone is also the perfect foundation for smart home hubs like SmartThings or Home Assistant, giving them an unbreakable connection for maximum reliability.
Beyond entertainment, smart wiring is a cornerstone of efficient home energy management. The smart home energy management segment is projected to hit $17.5 billion by 2027, a massive leap from $2.95 billion in 2017. Wired devices like smart thermostats and grid-responsive appliances can optimize energy use in real-time, with some estimates suggesting potential consumption cuts of 15-30%. You can discover more insights about the smart home market on fortunebusinessinsights.com.
Banishing Wi-Fi Dead Zones for Good
Finally, let's talk about creating the ultimate wireless network. Remember those Cat6a runs you strategically placed in ceilings or high on walls? It's time to install your Power over Ethernet (PoE) wireless access points (WAPs). These are brilliant devices that get both power and data from a single Ethernet cable, which you’ll connect to a PoE-capable switch back in your panel.
By placing just two or three of these WAPs in key locations, you create a powerful, commercial-grade Wi-Fi system. Your phone, laptop, and tablets will seamlessly hand off between them as you move around, ensuring you have a ridiculously strong and fast signal in every corner of your house—from the basement workshop to the attic bedroom. This is how you kill dead zones for good.
Common Questions About Smart Wiring Your Home
Even with the best-laid plans, taking on a smart wiring project is bound to bring up questions. That's completely normal. You're probably wondering about the cost, what works with what, and if you’re making the right long-term decisions. Let's dig into some of the things homeowners ask most.
With Wi-Fi getting faster all the time, one of the biggest questions is whether all this wiring is even necessary. While wireless is undeniably convenient, it still can't touch the raw speed, security, and absolute reliability of a hardwired connection for your most important gear—think work computers, streaming boxes, and security cameras.
Can I Do This Myself?
That really depends on your skills and what the local rules are. If you're just pulling low-voltage cables like Cat6a or speaker wire through existing walls, it's often a solid DIY project. You’ll get comfortable drilling through studs, maneuvering fish tape, and punching down keystone jacks.
But, if you're looking at a new build where walls are open, or you need to run new electrical outlets for your gear, it’s time to call in the pros. A low-voltage installer or a licensed electrician has the right tools and know-how to get the job done right, fast, and up to code.
A Note from Experience: A professional crew can typically wire an average-sized house in two to five days, depending on how complex the setup is. Going the DIY route will save you a lot on labor, but don't underestimate the time it takes to get that same clean, professional result.
What's a Realistic Budget for Smart Wiring?
The final bill for a smart wiring project can swing wildly. It really boils down to three things: the size of your house, the quality of the components you pick, and whether you're doing the work yourself or hiring it out.
- DIY Material Costs: For a standard 2,000-square-foot home, plan on spending somewhere between $800 and $1,500 for the parts. This covers things like a 1000-foot box of Cat6a cable, the central wiring panel, a network switch, wall plates, and the tools to put it all together.
- Professional Installation: Bringing in a pro will add labor to the bill, usually in the $3,000 to $8,000 range, sometimes more. It’s a significant jump, but you're paying for a guaranteed result and saving yourself dozens of hours of hassle.
Security is a huge reason people invest in this kind of infrastructure. The global smart home market is expected to balloon to $1.03 trillion by 2035, and home security is a major piece of that pie. In North America, hardwired PoE cameras are already cutting false alarms by up to 40% compared to wireless ones because the stable connection enables much more reliable AI analysis. You can see the full research on the smart home automation market on precedenceresearch.com.
Ultimately, this kind of project isn't just about making your home work better today. It's an investment that adds real, tangible value by future-proofing it for whatever comes next.
At Automated Home Guide, we're here to help you build a smarter, safer, more connected home. Check out our other guides and resources to bring your vision to life. https://automatedhomeguide.com


Leave a Reply